
Car Cleaning Checklist for Professionals: A Step-by-Step Guide

A professional car cleaning checklist is a detailed, systematic guide that ensures every vehicle receives a consistent, high-quality cleaning. For professionals, this checklist is vital for maintaining standards, improving efficiency, and delivering exceptional results to clients. It covers every area of the vehicle, from exterior paintwork and wheels to interior surfaces and upholstery, ensuring no spot is missed and every step is performed correctly. Following such a guide helps achieve a truly spotless finish, enhancing customer satisfaction and building a strong reputation.
Why a Professional Checklist is Essential
Using a structured checklist brings many benefits to any professional car cleaning operation. It helps standardize your services, meaning every car gets the same high level of care. This consistency builds trust with your customers.
A checklist also boosts efficiency. When you know the exact order of tasks, you save time and reduce wasted effort. This allows you to clean more cars in less time, increasing your business’s productivity.
Furthermore, a checklist acts as a quality control tool. It ensures that all necessary steps are completed, preventing oversights and missed spots. This leads to a superior finish and happier clients who are more likely to return and recommend your services.
Essential Tools and Supplies for Professional Cleaning
Having the right tools and supplies is fundamental for any professional car cleaning service. High-quality products not only make the job easier but also deliver better, longer-lasting results. Investing in durable equipment pays off in the long run.
Organizing your tools helps streamline your workflow. Keep interior cleaning items separate from exterior ones. This prevents cross-contamination and ensures you always have what you need within reach.
Below is a table outlining key tools and supplies for a professional car cleaning setup.
| Category | Item | Purpose |
|---|---|---|
| Exterior Cleaning | Pressure Washer | Quickly removes loose dirt and grime. |
| Two-Bucket Wash System | Prevents dirt transfer to paintwork. | |
| Microfiber Wash Mitts | Gentle on paint, holds soap well. | |
| Wheel Brushes (various sizes) | Cleans spokes, barrels, and calipers effectively. | |
| Tire Brush | Scrubs tire sidewalls. | |
| Car Shampoo (pH-neutral) | Safe for paint, creates rich foam. | |
| Iron Remover | Dissolves embedded iron particles. | |
| Clay Bar & Lubricant | Removes bonded contaminants from paint. | |
| Microfiber Drying Towels | Absorbent, streak-free drying. | |
| Paint Sealant or Wax | Adds protection and shine. | |
| Glass Cleaner (ammonia-free) | Streak-free window cleaning. | |
| Interior Cleaning | Vacuum Cleaner (wet/dry) | Removes dirt, dust, and spills. |
| Detailing Brushes (soft & stiff) | Cleans vents, crevices, and upholstery. | |
| All-Purpose Cleaner (APC) | Versatile for various interior surfaces. | |
| Interior Protectant | Conditions and protects plastic/vinyl. | |
| Upholstery Cleaner/Extractor | Deep cleans fabric seats and carpets. | |
| Leather Cleaner & Conditioner | Safely cleans and nourishes leather. | |
| Microfiber Towels (various types) | For wiping, buffing, and cleaning. | |
| Air Freshener/Odor Eliminator | Leaves a fresh scent. | |
| Miscellaneous | Gloves & Safety Glasses | Personal protection. |
| Buckets (multiple) | For wash and rinse water. | |
| Hoses & Nozzles | Water delivery. | |
| Work Lights | Ensures visibility in all areas. |
Exterior Car Cleaning Checklist Steps
The exterior of a car is the first thing people see. A thorough cleaning process protects the paint and enhances its appearance. Follow these steps for a brilliant finish.
1. Pre-Wash and Rinse
Start by removing loose dirt and debris. Use a pressure washer to rinse the entire vehicle, working from top to bottom. This prevents scratching the paint during the washing stage.
Apply a pre-wash foam or snow foam using a foam cannon. Let it dwell for several minutes to loosen grime. Rinse thoroughly again, ensuring all foam and loose dirt are gone.
2. Wheel and Tire Cleaning
Wheels and tires are often the dirtiest parts of a car. Use dedicated wheel cleaner and various brushes to clean spokes, barrels, and calipers. Agitate the cleaner with brushes to remove brake dust and road grime.
Scrub the tires with a stiff tire brush and a tire cleaner to remove old dressing and dirt. Rinse the wheels and tires completely before moving on to the paintwork.
3. Two-Bucket Wash Method
This method greatly reduces the risk of scratching the paint. Fill one bucket with car shampoo and water, and the other with clean rinse water. Both buckets should have grit guards at the bottom.

Dip your microfiber wash mitt into the soap bucket, wash one section of the car, then rinse the mitt in the clean water bucket before dipping it back into the soap. Work from top to bottom, washing one panel at a time. Rinse each section as you go to prevent soap from drying.
4. Paint Decontamination
Even after washing, paint can have embedded contaminants. Spray an iron remover over the paint and let it react. It will often turn purple as it dissolves iron particles. Rinse thoroughly.
Next, use a clay bar with a clay lubricant. Gently glide the clay bar over the paint surface to pick up bonded contaminants like tree sap, tar, and industrial fallout. Fold the clay frequently to expose a clean surface. This step leaves the paint feeling smooth.
5. Drying Techniques
Proper drying prevents water spots and streaks. Use large, soft microfiber drying towels. Gently blot or drag the towel across the surface. Avoid rubbing vigorously.
For faster drying and to reach tight areas, a car blower or air compressor can be used. This is especially helpful for door jambs, mirrors, and wheel crevices.
6. Paint Protection
Apply a high-quality wax, sealant, or ceramic coating to protect the paint. This adds a layer of defense against environmental elements and enhances shine. Follow the product instructions for application and removal.
Ensure the paint is completely dry and cool before applying any protection. Buff off any excess product with a clean microfiber towel for a streak-free finish.
7. Glass Cleaning
Clean all exterior glass, including the windshield, side windows, and rear window. Use an ammonia-free glass cleaner and two clean microfiber towels. Spray the cleaner onto one towel, wipe the glass, then buff dry with the second clean, dry towel. This prevents streaks.
8. Trim and Tire Dressing
Restore faded exterior plastic and rubber trim with a dedicated trim restorer or protectant. Apply tire dressing evenly to the tire sidewalls for a clean, dark finish. Avoid getting dressing on the paint or wheel surfaces.
Interior Car Cleaning Checklist Steps
A clean interior makes a huge difference in how a car feels. It also helps maintain the vehicle’s value. Follow these steps for a fresh and inviting cabin.
1. De-clutter and Vacuum
Remove all trash, personal items, and floor mats from the car. Use a powerful vacuum cleaner with various attachments to thoroughly vacuum carpets, seats, and floor mats. Pay close attention to under the seats and in crevices.
2. Surface Cleaning (Dash, Doors, Console)
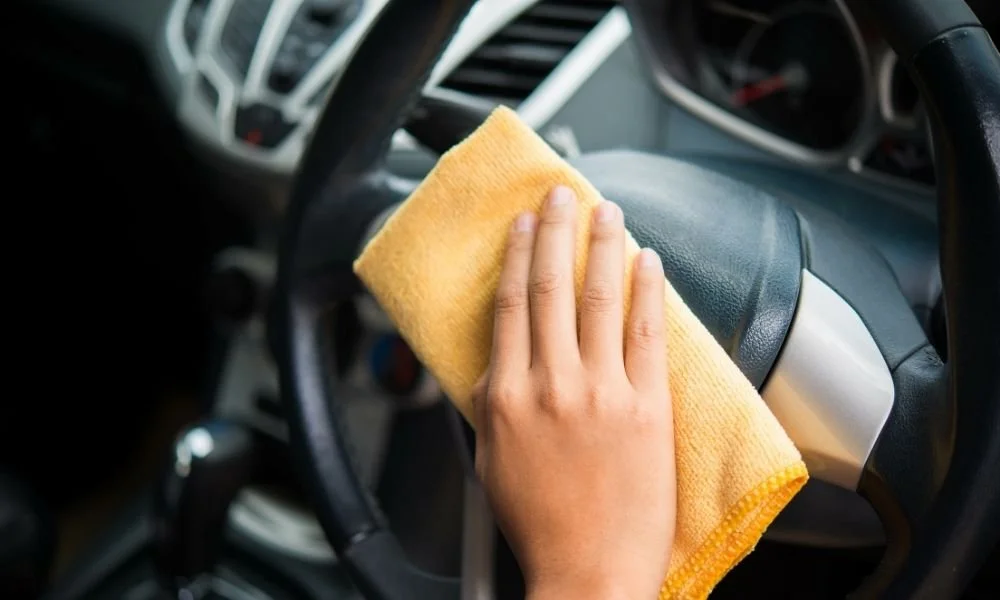
Spray an all-purpose cleaner (APC) or a dedicated interior cleaner onto a microfiber towel, not directly onto surfaces. Wipe down the dashboard, door panels, center console, and steering wheel. Use detailing brushes for vents and tight spots.
Follow up with an interior protectant to condition and protect plastic and vinyl surfaces from UV damage. This also leaves a natural, non-greasy finish.
3. Upholstery and Carpet Cleaning
For fabric seats and carpets, identify any stains. Pre-treat stubborn spots with an upholstery spot cleaner. Use an upholstery extractor with a suitable cleaning solution to deep clean and remove dirt and odors from fabric surfaces.
Ensure proper ventilation to help upholstery dry quickly and prevent mildew. Brush the fabric fibers to restore their original look.
4. Leather Care
If the car has leather seats, use a dedicated leather cleaner. Spray it onto a soft brush or microfiber towel and gently agitate the surface. Wipe clean with a separate microfiber towel.
Follow with a leather conditioner to moisturize and protect the leather. This helps prevent cracking and keeps the leather soft and supple.
5. Interior Window and Mirror Cleaning
Clean all interior glass, including the rearview mirror and side windows. Use an ammonia-free glass cleaner and two clean microfiber towels, just like for the exterior glass. This ensures a clear view and streak-free finish.
6. Air Freshening
After all cleaning is done, use an odor eliminator or air freshener to leave the interior smelling fresh. Avoid overpowering scents. A neutral, clean scent is often preferred by clients.
Engine Bay Cleaning (Optional but Recommended)
Cleaning the engine bay can greatly improve a car’s overall appearance and make it easier to spot potential issues. This step requires extra care due to sensitive electronic components.
Start by covering sensitive areas like the battery, air intake, and exposed electrical connections with plastic bags or foil. Use an engine degreaser to break down grease and grime. Spray it evenly and let it dwell.
Gently agitate with brushes, then rinse carefully with a low-pressure stream of water. Avoid direct high-pressure spray on electrical components. Dry the engine bay using a blower or microfiber towels. Finish with a dressing to protect plastic and rubber components.
Final Inspection and Quality Control
Before presenting the car to the client, perform a thorough final inspection. This is your last chance to catch any missed spots or imperfections. Walk around the entire vehicle, inside and out, with a critical eye.
Check all surfaces for streaks, smudges, or remaining dirt. Open doors, trunk, and hood to inspect jambs and hidden areas. Ensure all interior surfaces are dry and protected. This final check guarantees the highest quality output.Common Mistakes to Avoid
Even experienced professionals can make mistakes. Being aware of these common errors helps maintain high standards:
- Using dirty wash mitts or towels: This can cause scratches and swirl marks on the paint. Always use clean, dedicated tools.
- Washing in direct sunlight: Soap and water can dry too quickly, leading to water spots and streaks. Work in the shade or on a cool surface.
- Neglecting door jambs and crevices: These areas collect a lot of dirt and can detract from an otherwise clean car.
- Using harsh chemicals on delicate surfaces: Always use appropriate cleaners for specific materials (e.g., pH-neutral for paint, ammonia-free for tinted windows).
- Over-saturating interior fabrics: Too much moisture can lead to mildew and unpleasant odors. Use extractors effectively and ensure proper drying.
- Skipping paint decontamination: Without claying, paint protection won’t bond as effectively, and the finish won’t be as smooth.
Benefits of Following a Professional Car Cleaning Checklist
Adopting a structured checklist offers numerous advantages for professional detailers and car wash businesses. It goes beyond just cleaning a car; it’s about building a reliable and respected service.
- Consistent Quality: Every car receives the same high standard of cleaning, ensuring client satisfaction.
- Increased Efficiency: A clear process reduces guesswork and speeds up the cleaning time, allowing for more jobs.
- Reduced Errors: Minimizes the chance of missing spots or steps, leading to fewer re-dos.
- Enhanced Reputation: Delivering consistently excellent results builds trust and encourages repeat business and referrals.
- Improved Training: Serves as an excellent training tool for new staff, ensuring they learn the correct procedures from day one.
- Cost Savings: Proper techniques and product usage, guided by a checklist, can reduce waste and product misuse.
- Professional Image: Demonstrates a commitment to quality and professionalism to clients.
FAQs
How often should a professional car cleaning be done?
For most vehicles, a professional cleaning every 3-6 months is ideal to maintain its condition. However, cars exposed to harsh weather, heavy use, or frequent spills might benefit from more frequent cleaning, perhaps every 1-2 months.
What is the difference between car washing and car detailing?
Car washing is a basic cleaning to remove surface dirt. Car detailing is a much more thorough, systematic process that cleans, restores, and protects every part of the vehicle, both inside and out, to a very high standard. It involves specialized tools and techniques.
Is it safe to clean a car engine bay?
Yes, it can be safe if done correctly. It’s crucial to cover sensitive electrical components and use a low-pressure water rinse. Using a dedicated engine degreaser and protectant is also recommended. If unsure, it’s best to consult an expert.
Why is a two-bucket wash method important?
The two-bucket method helps prevent swirl marks and scratches on the paint. One bucket contains soapy water for washing, and the other contains clean rinse water. You rinse your wash mitt in the clean water after each section, removing dirt before it goes back into the soap bucket and onto the car.
What are the best products for streak-free windows?
For streak-free windows, use an ammonia-free glass cleaner. Pair it with two clean, high-quality microfiber towels: one for applying and wiping, and a second dry one for buffing to a perfect shine. Avoid cleaning in direct sunlight.
Conclusion
Implementing a comprehensive car cleaning checklist for professionals is a cornerstone of a successful detailing business. It ensures consistency, boosts efficiency, and guarantees a high-quality finish every time. By following a structured approach, from pre-wash to final inspection, you can protect vehicle surfaces, enhance their appearance, and build a strong reputation for excellence.
Take the time to develop and refine your own professional checklist. Regularly review your processes and adapt them to new products or techniques. This commitment to detail will set your services apart and keep your clients coming back.
Related posts
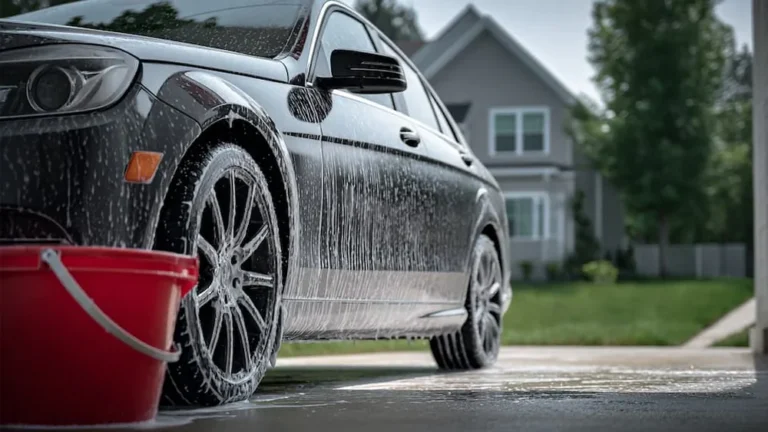 Best Way to Clean and Maintain Your Car’s Paint Finish Safely
Keeping your car’s paint finish looking fresh is more than just about looks. A well-maintained paint job protects your car from rust, UV damage, and can…
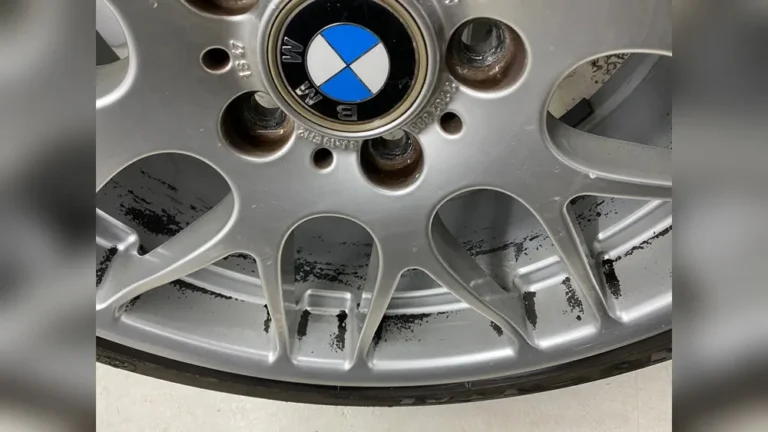 How to Remove Brake Dust from Car Wheels Quickly and Safely
If you own a car, you know how quickly the wheels can get dirty. One of the most stubborn types of dirt is brake dust. Even…
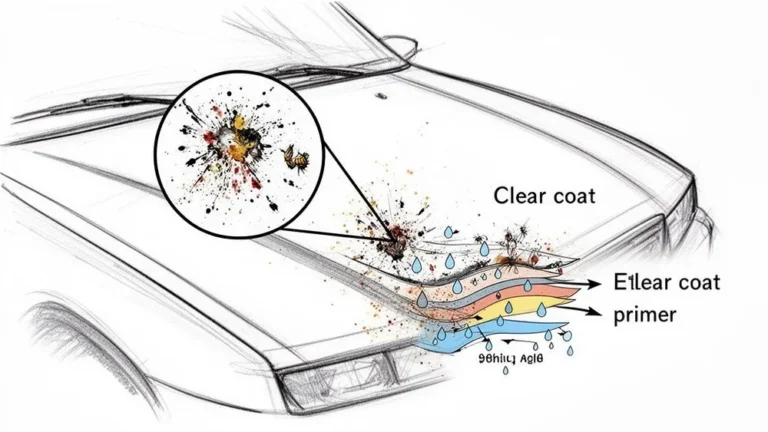 How to Remove Bug Splatter from Your Car Paint: Expert Tips
Bug splatter on your car paint is more than just an annoying sight—it can actually harm your vehicle’s surface. Insects hit your car at high speeds,…