
How to Use a Polisher to Restore Paint on Your Car Like a Pro
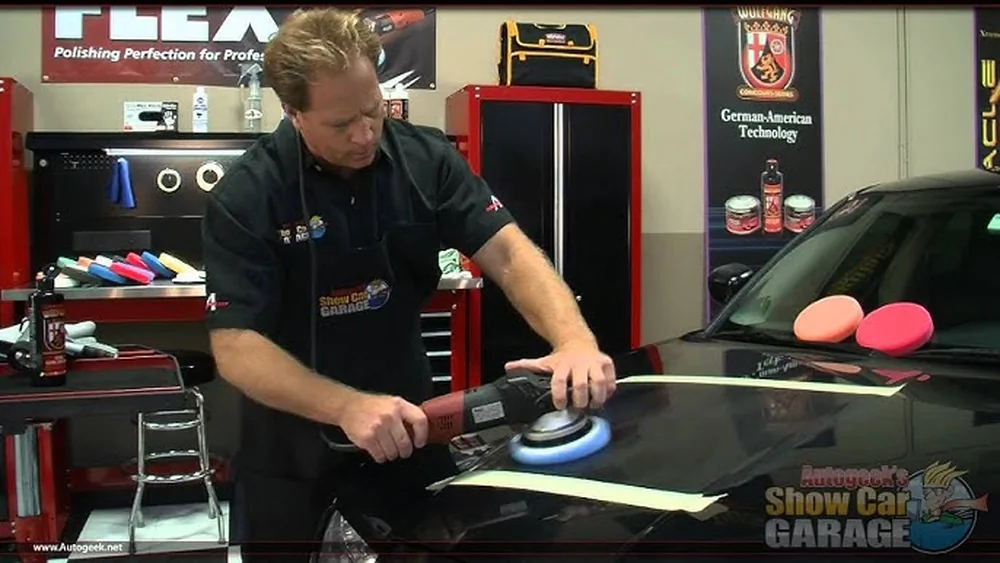
Restoring your car’s paint can make it look almost brand new. Scratches, swirl marks, and dull patches often ruin the shine of your vehicle. Many people think only professionals can fix this, but you can achieve great results with the right tools and steps. Using a polisher is one of the best ways to restore your car’s paint, but it must be done correctly to avoid damage. This guide shows you how to use a polisher safely, explains what you need, and shares expert tips to help you succeed—even if you’re new to car detailing.
Understanding Paint Restoration
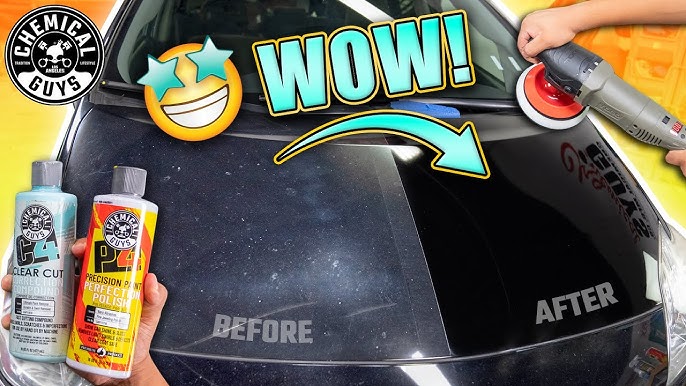
Paint restoration is more than just making your car look shiny. It’s about removing imperfections like scratches, oxidation, and swirl marks that make paint look tired. Polishing helps smooth the surface, making the color deeper and the shine brighter.
Modern cars usually have a clear coat on top of the paint. This clear coat protects the color but can get damaged over time. Polishing removes a thin layer of this clear coat, along with the imperfections, so your car looks fresh again.
Why Use A Polisher?
Manual polishing can be exhausting and slow. A dual-action polisher or a rotary polisher uses powerful spinning and/or oscillating motions to work polish into the paint. This process is:
- Faster and more consistent
- Removes deeper defects than hand polishing
- Gives a professional finish
However, a polisher can cause damage if used incorrectly. Learning the proper technique is essential.
Choosing The Right Polisher And Products
Not all polishers or products work the same. Picking the right tools is the first step toward a successful paint restoration.
Types Of Polishers
There are two main types:
| Polisher Type | Motion | Best For | Skill Level |
|---|---|---|---|
| Dual-Action (DA) | Spins and Oscillates | Swirl marks, light scratches | Beginner to Intermediate |
| Rotary | Spins only | Deep scratches, heavy defects | Advanced |
Most beginners should start with a dual-action polisher. It’s safer and less likely to burn paint.
Choosing Polishing Pads
Pads attach to the polisher and come in various types:
- Foam pads: Good for light defects and final polishing.
- Microfiber pads: Remove heavier defects.
- Wool pads: Aggressive; for serious paint correction.
You’ll often need more than one pad for different stages.
Picking The Right Polish
Polishes have varying levels of abrasion:
| Polish Type | Purpose | Common Use |
|---|---|---|
| Compound | Heavy cutting | Deep scratches, oxidation |
| Medium Polish | Moderate correction | Swirl marks, light scratches |
| Finishing Polish | Fine polishing | Gloss enhancement |
Start with the least abrasive polish that gives you the results you want.

Credit: www.clearpro.com
Preparing Your Car For Polishing
Preparation is a step many beginners skip, but it’s crucial for safe and effective polishing. Skipping this can lead to more scratches or poor results.
Cleaning
Wash your car thoroughly. Remove all dirt, dust, and bugs. Any debris left on the paint can scratch it during polishing.
- Use a pH-neutral car wash soap
- Rinse well
- Dry with a microfiber towel
Claying
A clay bar removes stuck-on contaminants that washing misses. Rub the clay bar over the paint with lubricant. The surface will feel smooth when done.
Masking
Use masking tape to protect sensitive areas:
- Badges
- Trim
- Rubber seals
- Sharp edges
This prevents polish from staining or damaging these parts.
Step-by-step Guide: Using A Polisher
Polishing your car is simple if you follow the right steps. Take your time and work carefully.
1. Gather Your Tools
You’ll need:
- Polisher (dual-action or rotary)
- Polishing pads (foam, microfiber, or wool)
- Polishes (compound, medium, finishing)
- Microfiber towels
- Masking tape
- Clay bar and lubricant
- Car wash soap and buckets
2. Inspect Your Paint
Check your car under bright light. Mark areas with heavy damage. Not all parts of the car need the same treatment.
3. Apply Masking Tape
Cover all sensitive areas. This step takes a few minutes but protects your car’s trim and details.
4. Attach The Pad And Prime
Fit the pad to the polisher. Apply a small amount of polish to the pad (about 4 pea-sized dots). Spread polish over the pad’s surface for even coverage.
5. Work In Small Sections
Divide the car’s panels (hood, doors, fenders) into 2×2 foot sections. Working in small areas helps you control the process and avoid drying out the polish.
6. Set The Polisher Speed
For most dual-action polishers:
- Start at speed 2-3 to spread polish
- Increase to speed 4-5 for working the polish
Rotary polishers require more caution. Beginners should start slow.
7. Use Proper Technique
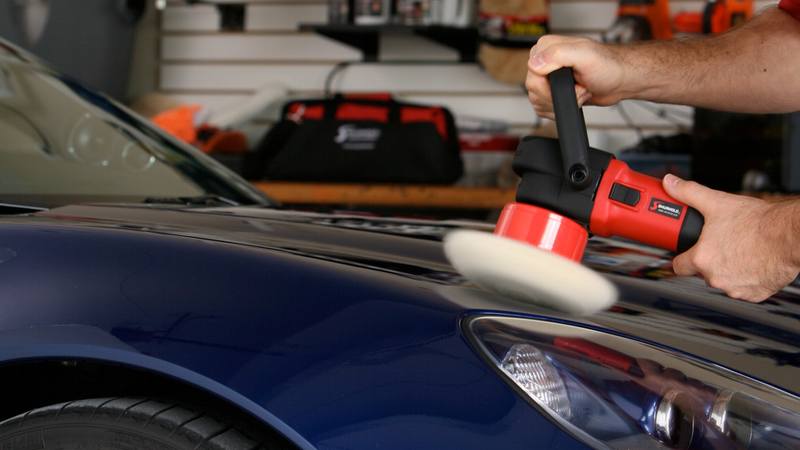
Hold the polisher with both hands. Place it on the paint before turning it on. Move slowly, overlapping each pass by 50%.
- Keep the pad flat on the surface
- Don’t press too hard—let the machine do the work
- Move side-to-side, then up-and-down
8. Check Your Progress
After a few passes, stop and wipe the area with a clean microfiber towel. Inspect the paint. If defects remain, repeat with a more abrasive polish or pad.
9. Repeat Across The Car
Continue section by section. Change pads if they become saturated or dirty. Use a new pad for finishing polish.
10. Final Wipe Down
After polishing, wipe the entire car with a clean microfiber towel. Remove any leftover polish or dust.
11. Apply Protection
Polishing removes some protection from your paint. Apply a high-quality wax or sealant to protect the restored finish.
Common Mistakes And How To Avoid Them
Even experienced detailers make mistakes. Knowing these can save you time and prevent damage.
- Skipping preparation: Not washing or claying leads to more scratches.
- Using the wrong pad: Too aggressive pads can burn paint; too soft won’t remove defects.
- Pressing too hard: Excessive pressure damages paint and wears out the pad.
- Working too fast: Rushing doesn’t allow the polish to do its job.
- Neglecting pad cleaning: Dirty pads reduce effectiveness and cause swirling.
A non-obvious tip: Always check the pad temperature. Overheated pads can cause paint damage. Let pads cool if they feel hot.
Expert Tips For Better Results
Getting a mirror-like shine isn’t just about following steps. Small changes can make a big difference.
- Use proper lighting: LED or halogen lights help you see imperfections clearly.
- Test spot first: Always polish a small area before doing the whole car. This shows how the paint reacts.
- Don’t mix products: Stick with one brand for polish and pads. Mixing can cause unpredictable results.
- Pad maintenance: Clean pads after every panel. You can use pad cleaning brushes or compressed air.
Another insight: Weather matters. Polishing in hot, direct sunlight dries the polish too fast and can leave streaks. Work in a shaded area or indoors.
Credit: shurhold.com
Polisher Vs. Hand Polishing: What’s The Difference?
Some people wonder if hand polishing can achieve similar results. Here’s a quick comparison:
| Method | Effectiveness | Time Required | Risk |
|---|---|---|---|
| Polisher | High – removes deeper defects | 1–2 hours for full car | Low (with proper technique) |
| Hand Polishing | Low – only minor defects | 4–6 hours for full car | Very low |
A polisher gives faster and more dramatic results. Hand polishing is safer but limited.
Caring For Your Restored Paint
After polishing, your paint is clean and smooth—but it’s also exposed. Protecting it keeps your car looking great longer.
- Apply wax or sealant every 3–6 months.
- Wash regularly with pH-neutral soap.
- Avoid automatic car washes with harsh brushes.
- Use soft microfiber towels for drying and cleaning.
If you park outside, consider using a car cover. UV rays and pollution can damage restored paint quickly.
How Often Should You Polish?
Polishing removes a thin layer of the clear coat. Most experts recommend polishing once or twice a year for daily drivers. Too much polishing can thin the clear coat and cause fading.
If you notice swirl marks or scratches, try using a finishing polish or a light compound. For minor defects, sometimes a quick hand polish is enough.
Frequently Asked Questions
Can A Polisher Damage My Car’s Paint?
Yes, if used incorrectly. Using high speeds, aggressive pads, or too much pressure can burn paint or leave marks. Dual-action polishers are safer for beginners.
How Do I Know Which Polish And Pad To Use?
Start with the least abrasive combination. Test on a small area. If defects remain, use a stronger polish or pad. Always check manufacturer guidelines for your car’s paint.
How Long Does It Take To Polish A Car?
A full car can take 1–2 hours with a polisher, depending on the size and condition. Preparation and protection steps add extra time.
Do I Need To Wax After Polishing?
Yes. Polishing removes old wax and leaves the paint exposed. Waxing or sealing after polishing protects the restored finish and keeps the shine longer.
Where Can I Learn More About Paint Restoration?
You can find detailed guides and videos at Autogeek. This site offers expert tips and product reviews for beginners and pros.
Restoring your car’s paint with a polisher is one of the best ways to bring back its shine and value. With the right tools, careful preparation, and proper technique, you can achieve a professional finish at home. Remember to protect your hard work with wax or sealant and avoid common mistakes.
Whether your car is old or new, polishing helps it stand out and keeps it looking great for years to come.
Credit: www.youtube.com
Related posts
 Why You Should Use a Foam Cannon for Car Washing: Ultimate Guide
Washing your car is more than just making it look good. It protects the paint, keeps the value high, and makes driving feel better. But if…
 How to Clean Leather Seats Without Damaging Them: Expert Tips
Keeping your leather seats clean can be a challenge. Leather looks beautiful and feels luxurious, but it needs special care. Many people worry about damaging their…
 Why Using a Ceramic Coating Spray is Important for Your Car’s Shine
If you care about your car’s appearance and value, you probably wash and wax it regularly. But did you know there’s a better way to protect…