
How to Restore Dull Car Headlights: Easy DIY Guide
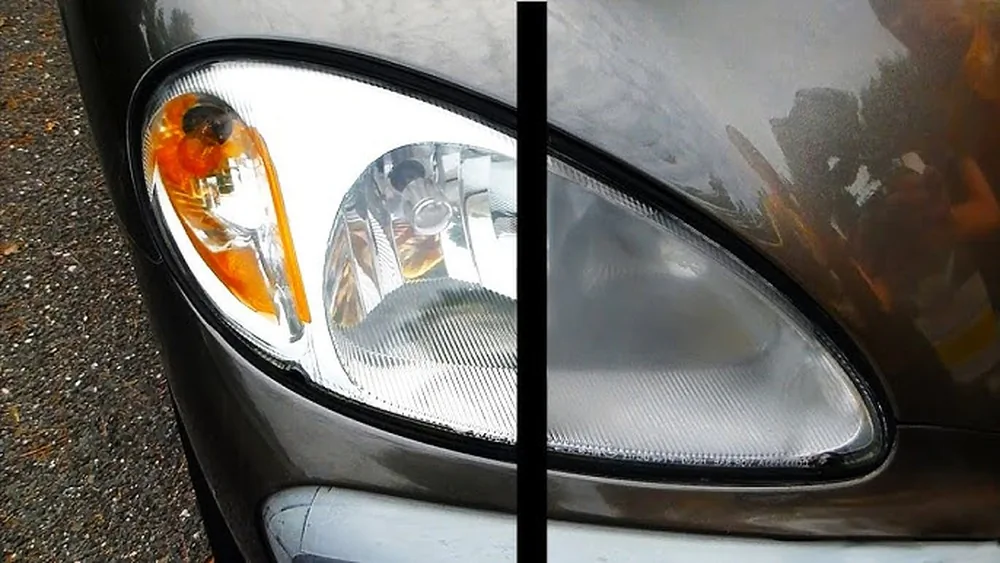
Car headlights are vital for safe driving, especially at night or during bad weather. But over time, you may notice your headlights look cloudy, yellow, or dull. This is a common problem, and it can make your car look old and reduce the brightness of your lights.
The good news is, you can restore dull headlights at home with the right approach. Let’s explore why headlights become dull, what methods work best, and step-by-step tips to bring back that crystal-clear shine.
Why Do Headlights Become Dull?
Most modern cars use polycarbonate plastic for their headlights. This material is strong and lightweight, but it’s not immune to damage. Here’s why headlights often lose their clarity:
- UV rays from the sun break down the outer layer of the plastic, causing it to become cloudy.
- Road debris and sand scratch the surface, making it rough and hazy.
- Chemicals and pollution can react with the plastic, speeding up the dulling process.
- Moisture sometimes gets inside the headlight, causing fogging or staining.
According to the AAA Foundation for Traffic Safety, dull headlights can reduce light output by up to 80%. That means you might see much less of the road at night, increasing your risk of accidents.
Signs Your Headlights Need Restoration
You don’t need special tools to spot dull headlights. Look for these signs:
- Cloudy or yellow appearance
- Scratches or roughness on the surface
- Reduced brightness at night
- Water stains or fog inside the lens
If you notice any of these, it’s time to act. Restoring your headlights can improve both safety and your car’s appearance.

Credit: www.amazon.com
Diy Headlight Restoration: Step-by-step Guide
Many people think restoring headlights is hard. But with the right materials and some patience, you can do it yourself. Here’s a proven step-by-step process that works for most cars.
What You’ll Need
- Microfiber cloths
- Masking tape
- Water spray bottle
- Sandpaper (1000, 2000, and 3000 grit)
- Plastic polish or headlight restoration compound
- UV sealant or clear coat (optional, but highly recommended)
- Rubber gloves
Preparation
- Clean the headlights: Wash with soap and water to remove dirt.
- Dry thoroughly: Use a microfiber cloth for best results.
- Protect your paint: Place masking tape around the headlights to avoid scratching the car’s paint.
Sanding The Headlight
This step removes the damaged outer layer, which is the main cause of dullness.
- Wet the sandpaper (start with 1000 grit). Keep the headlight and sandpaper wet at all times to prevent deeper scratches.
- Sand in one direction: Move side to side, applying even pressure.
- Switch to finer sandpaper: Use 2000 grit, then 3000 grit, repeating the process. Each step should remove the scratches from the previous grit.
- Wipe clean: After sanding, clean the headlight with a damp cloth.
Polishing The Headlight
- Apply plastic polish: Put a small amount on a clean microfiber cloth.
- Buff in circles: Rub the polish into the headlight until it looks clear and shiny.
- Repeat if needed: For very dull headlights, you may need to polish twice.
Sealing The Headlight
Sanding and polishing remove the damaged layer, but also remove the factory UV protection. Applying a sealant helps protect your headlights from future damage.
- Apply UV sealant or clear coat: Follow the product instructions carefully.
- Let it dry: Most sealants need to dry for at least one hour.
Comparing Diy Kits Vs. Professional Services
You might wonder if you should buy a headlight restoration kit or pay for a professional service. Here’s a quick comparison to help you decide:
| Method | Cost | Time Needed | Results | DIY Skill Level |
|---|---|---|---|---|
| DIY (Home Materials) | $10–$30 | 1–2 hours | Very good if done carefully | Basic |
| Headlight Kit | $15–$40 | 45–90 minutes | Excellent for most cases | Beginner-friendly |
| Professional Service | $60–$150 | 30–60 minutes | Professional-grade | Not needed |
Professional services can be faster and guarantee results, but most people find DIY or kits offer great value, especially if you’re comfortable with hands-on tasks.

Credit: www.amazon.com
Common Mistakes To Avoid
Restoring headlights is simple, but there are a few mistakes that can cause poor results or even damage.
- Skipping the UV sealant: This leaves your headlights unprotected and they may become dull again within weeks.
- Using dry sandpaper: Always keep both the sandpaper and the lens wet to prevent scratching.
- Rushing the sanding process: Take your time at each grit stage for a smooth finish.
- Using household cleaners like baking soda: While some people recommend it, these often don’t remove deeper damage and can even scratch the lens.
- Ignoring cracks or deep chips: Restoration works best on surface dullness, not structural damage.
When To Replace Instead Of Restore
Sometimes, restoration isn’t enough. If your headlights have:
- Deep cracks or holes
- Severe internal fogging
- Broken mounting points
It’s usually better to replace the headlight assembly. Continuing to restore a badly damaged lens can be a waste of time and may not improve safety.
How Long Does The Restoration Last?
The results of headlight restoration can vary. With proper UV protection, most restorations last one to two years. However, if the car is parked outside in strong sun every day, you may notice dullness returning sooner. Regular cleaning and parking in the shade can help your clear headlights last longer.
Tips To Keep Headlights Clear Longer
- Wash regularly: Remove dirt and chemicals that can damage the plastic.
- Apply a UV protectant every few months.
- Avoid abrasive cleaners: Use products made for plastic lenses.
- Cover your car or park in a garage when possible.
A simple routine can double the life of your headlight restoration, saving you time and money.
Credit: www.autofinesse.com
Diy Vs. Kit: What’s Inside A Typical Headlight Restoration Kit?
If you choose a kit, here’s what you’ll often find:
| Kit Item | Purpose | Reusable? |
|---|---|---|
| Sandpaper (various grits) | Smooths away damaged layers | No |
| Polishing compound | Restores clarity and shine | Yes (if extra remains) |
| Applicator pads | For applying polish and sealant | Sometimes |
| UV sealant wipes or liquid | Protects against sun damage | No |
| Masking tape | Protects car paint | No |
| Instructions | Step-by-step guidance | Yes |
Most kits have enough materials for two headlights, but always check the packaging. Some brands offer more advanced sealants, which can last longer.
Non-obvious Insights For A Lasting Result
- Work in the shade, not direct sunlight. Heat can cause products to dry too quickly, making it hard to polish the lens smoothly.
- Use nitrile gloves when handling chemicals and sealants. Some products can irritate your skin or leave a sticky residue.
- Test on a small area first. If you’re unsure about a new product or method, try it on the corner of the lens to check for unexpected reactions.
- Check your local rules. In some places, using certain chemicals or disposing of them incorrectly can cause problems. Always follow safety guidelines.
Environmental Impact: Dispose Of Materials Safely
After you restore your headlights, you’ll have used sandpaper, cloths, and possibly chemical products. Dispose of these items according to local waste rules. Many cities have special sites for chemical disposal. Don’t pour leftover polish or sealant down the drain.
Useful External Resource
For more information on headlight restoration research and safety, visit the Wikipedia Headlamp page.
Frequently Asked Questions
How Often Should I Restore My Car Headlights?
Most people need to restore their headlights every one to two years. If your car is parked outside often, you may need to do it more frequently.
Can I Use Toothpaste To Clean Headlights?
Toothpaste can remove some surface haze due to its mild abrasives, but it does not remove deeper oxidation or provide UV protection. For long-lasting results, use a dedicated kit or proper sanding and sealing steps.
Is It Safe To Use A Power Drill With A Polishing Pad?
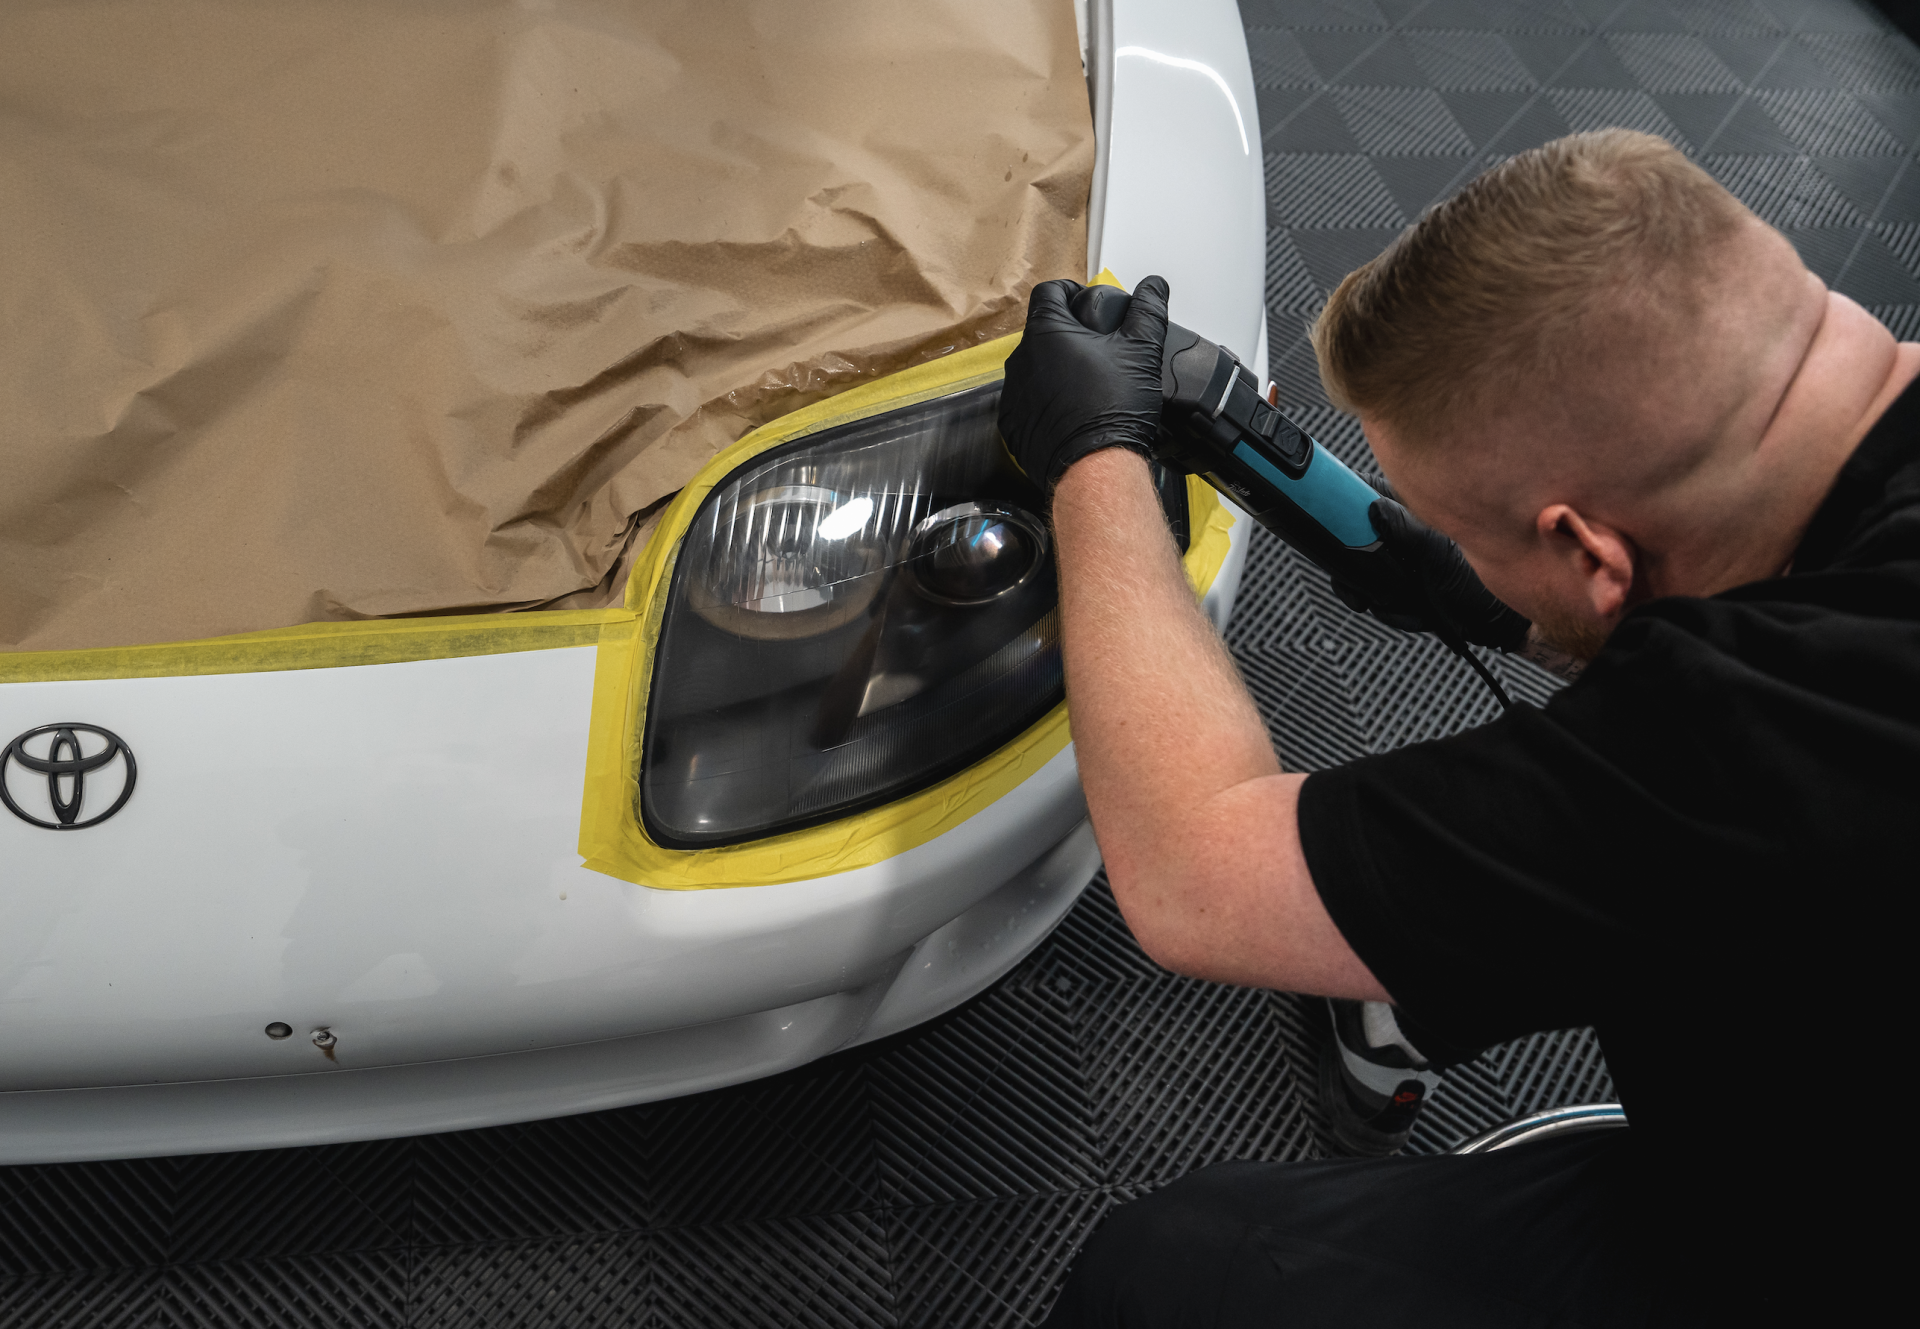
Yes, many restoration kits include attachments for a power drill. This can speed up the process and give a more even polish. Be careful not to apply too much pressure, which can damage the lens.
What If Water Gets Inside My Headlight After Restoration?
If water gets inside, it usually means the seal around the headlight is damaged. You’ll need to reseal the headlight or replace the gasket. Simply restoring the outside will not fix internal moisture issues.
Will Restoring Headlights Make Them As Good As New?
A proper restoration can make headlights look almost like new, but not always perfect, especially if there are deep cracks or severe yellowing. Regular maintenance helps keep them clear longer.
Restoring your dull car headlights is a simple, cost-effective way to improve safety and appearance. With careful steps and the right products, you can enjoy bright, clear lights on every drive.
Related posts
 Why You Should Use a Foam Cannon for Car Washing: Ultimate Guide
Washing your car is more than just making it look good. It protects the paint, keeps the value high, and makes driving feel better. But if…
 How to Clean Leather Seats Without Damaging Them: Expert Tips
Keeping your leather seats clean can be a challenge. Leather looks beautiful and feels luxurious, but it needs special care. Many people worry about damaging their…
 Why Using a Ceramic Coating Spray is Important for Your Car’s Shine
If you care about your car’s appearance and value, you probably wash and wax it regularly. But did you know there’s a better way to protect…