Learn how to clean car detailing brush properly to keep your tools in top shape and ensure spotless results every time. This guide covers simple steps, materials needed, and tips for different brush types, helping you maintain hygiene and extend brush life without hassle.
When it comes to keeping your car looking sharp, the tools you use play a big role. Among them, detailing brushes are essential for getting into those tight spots like vents, wheels, and crevices. But over time, these brushes pick up dirt, grime, and residue from polishes or cleaners. Knowing how to clean car detailing brush can make a huge difference in their performance and longevity. If you skip this step, brushes can spread contaminants back onto your vehicle, leading to scratches or uneven finishes. In this article, we’ll walk through practical ways to handle this task, drawing from hands-on experience in car care routines that have helped many people keep their rides pristine.
From personal trial and error over years of working on various cars, I’ve found that regular cleaning not only preserves the bristles but also saves money by avoiding frequent replacements. Start with gathering basic supplies like mild soap, warm water, and a soft cloth. The process is straightforward, but paying attention to the brush type whether it’s natural hair, synthetic, or boar bristle matters a lot. For instance, softer brushes need gentler handling to avoid damage.
“Regular maintenance of your detailing tools is key to achieving professional-level results at home,” says auto enthusiast and blogger Mike Thompson, who has shared tips from his garage experiments.
Types of Car Detailing Brushes and Why Cleaning Matters
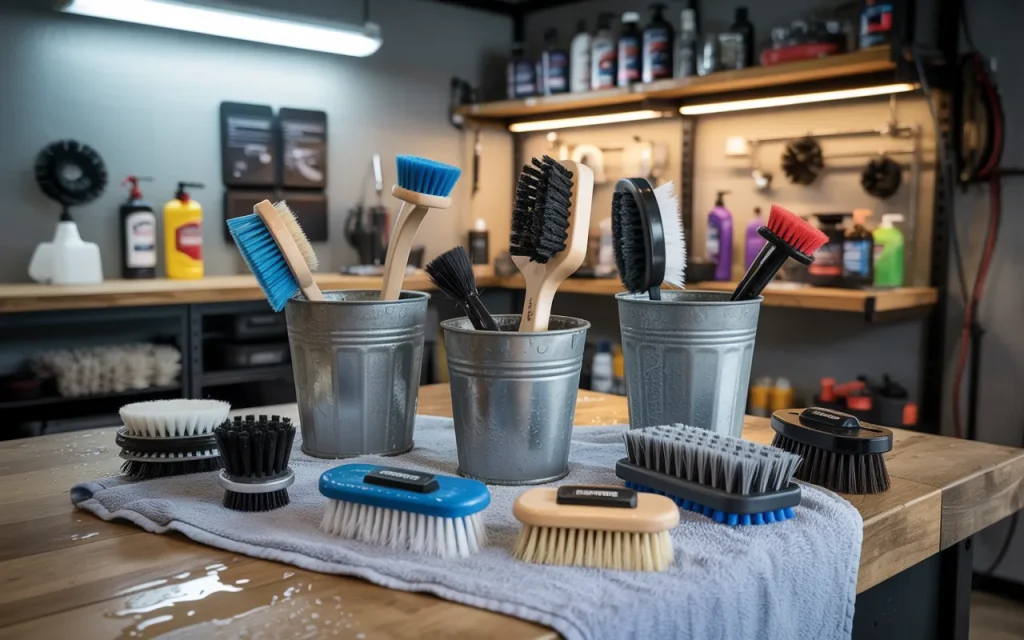
Car detailing brushes come in different materials and designs, each suited for specific tasks. Understanding these variations helps you approach cleaning with care. Natural bristle brushes, often made from horsehair or boar hair, are soft and ideal for delicate surfaces like dashboards or leather seats. They absorb products well but can trap oils and dust easily. Synthetic brushes, usually nylon or polyester, are more durable and resist chemicals better, making them great for wheels or engine bays. Then there are specialized ones like wheel brushes with long handles or vent brushes with slim profiles.
Cleaning these brushes isn’t just about appearance; it’s about hygiene and effectiveness. Dirt buildup can harden bristles, reducing their flexibility and causing them to scratch paint. Leftover wax or polish residues might transfer to the next job, creating streaks. By cleaning regularly, you prevent bacterial growth, especially if brushes get wet often. Think about how a dirty brush could undo all your hard work on a freshly washed car. Based on what I’ve seen in community forums and my own practice, neglecting this leads to quicker wear and tear, forcing you to buy new ones sooner.
Consider the environment too. If you detail cars in a humid area, brushes might develop mold if not dried properly after cleaning. In drier climates, dust accumulates faster. Tailoring your cleaning routine to these factors ensures better results. For example, after using a brush on greasy engine parts, immediate rinsing prevents stains from setting in.
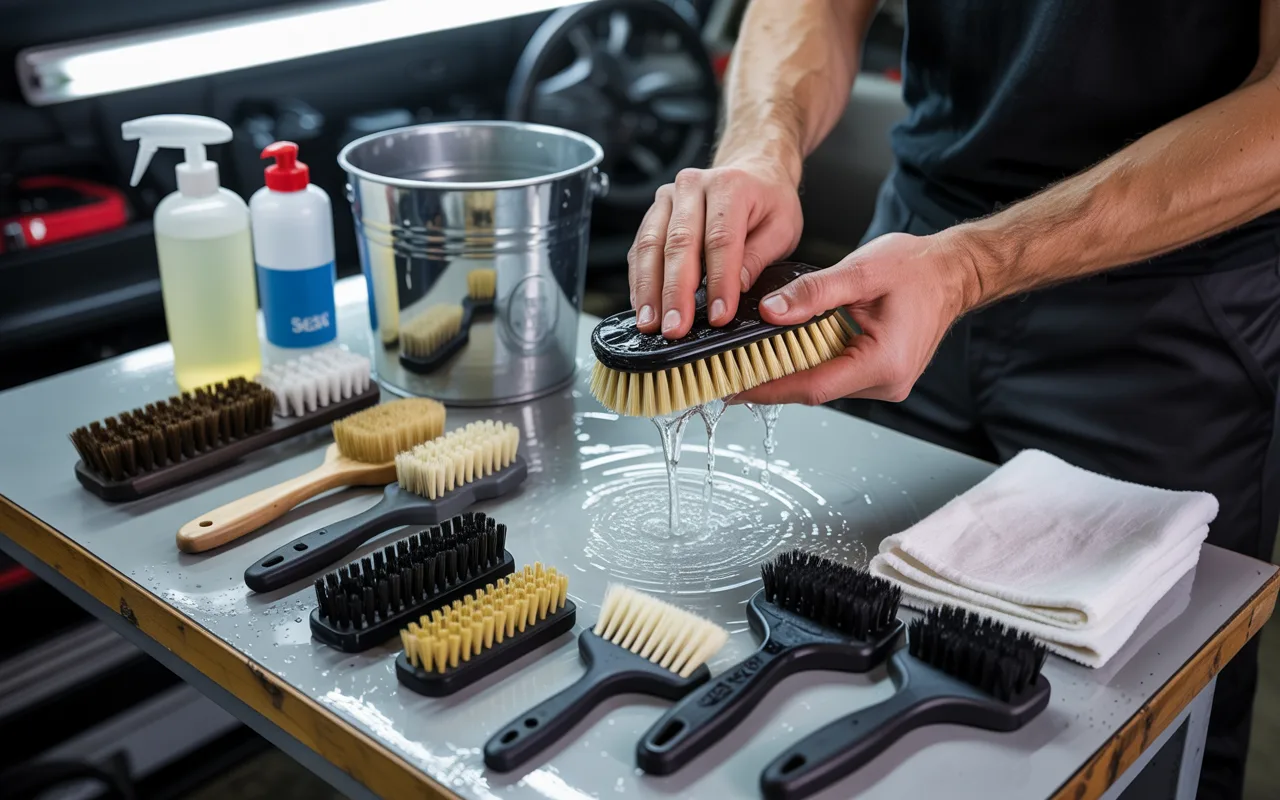
Materials Needed for Cleaning
Before starting, gather the right items to make the process smooth. You’ll need mild dish soap or a dedicated car shampoo that’s gentle on bristles. Avoid harsh detergents that could strip natural oils from hair brushes. Warm water works best for loosening grime, but not too hot to damage synthetics. A bucket or sink for soaking, plus a soft towel for drying, are essentials. Optional but helpful: white vinegar for natural disinfection or a soft-bristle toothbrush for scrubbing stubborn spots.
Why these materials? Soap breaks down oils without residue, water rinses everything away, and vinegar adds a mild acid to kill germs. From testing different setups, I’ve noticed that using filtered water prevents mineral deposits on brushes in hard water areas. Keep things organized to avoid cross-contamination, like using separate buckets for rinsing.
| Item | Purpose |
|---|---|
| Mild soap | Dissolves dirt and grime |
| Warm water | Loosens residues |
| Soft towel | Absorbs moisture gently |
| White vinegar | Disinfects naturally |
This simple table outlines the basics, keeping your setup efficient.
Step-by-Step Guide to Basic Cleaning
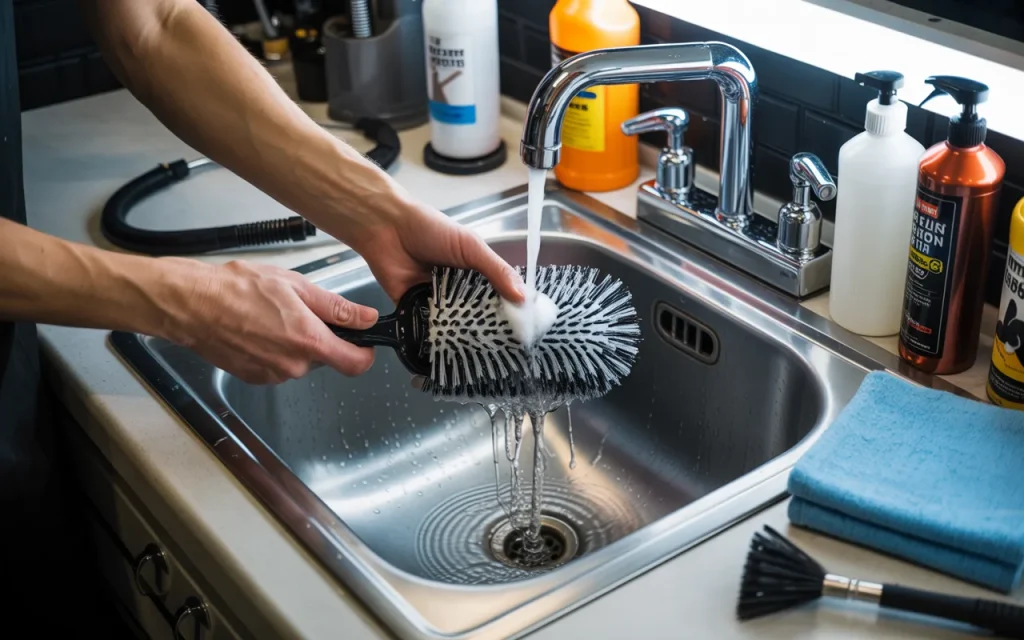
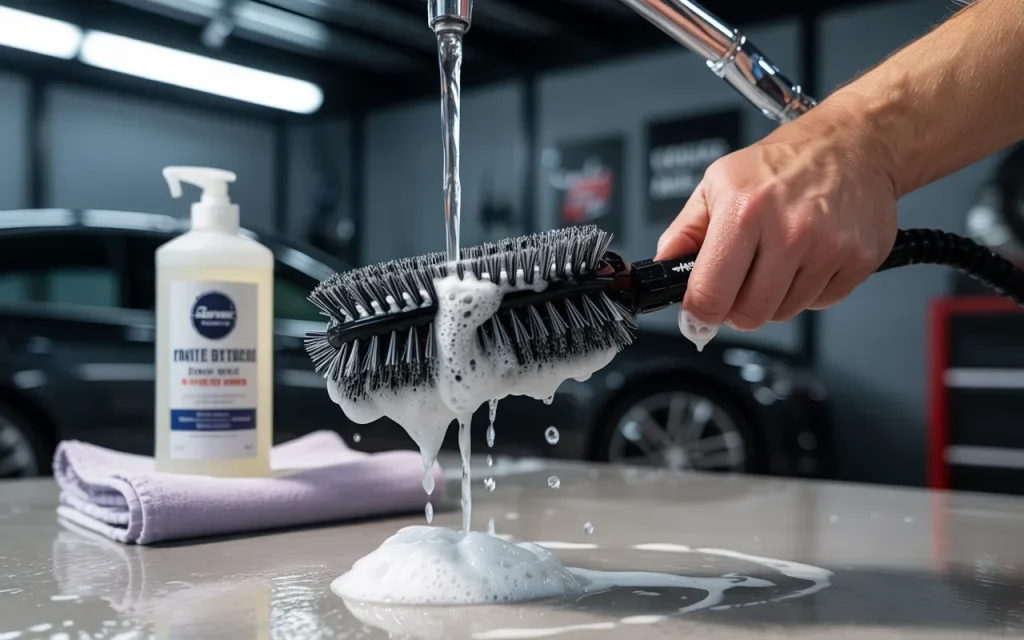
Let’s get into the hands-on part. First, rinse the brush under running water to remove loose debris. Hold it bristles down to let gravity help flush out particles. Next, fill a bucket with warm soapy water and submerge the brush, swirling it around for a minute or two. Use your fingers to gently massage the bristles, working from base to tip. This dislodges trapped dirt without pulling hairs.
For tougher buildup, let it soak for 5-10 minutes. Then, rinse thoroughly until the water runs clear. Squeeze out excess water carefully, avoiding twisting which can break bristles. Lay it flat on a towel to air dry, or hang it if possible to maintain shape. This method suits most brushes and takes about 15-20 minutes total.
I’ve cleaned dozens of brushes this way, and it always restores them nicely. If you notice lingering smells, add a splash of vinegar to the soak. Remember, patience here prevents damage; rushing might bend the ferrule, the metal part holding bristles.
In one instance, after detailing a muddy off-road vehicle, this routine removed all the caked-on soil without harming the soft horsehair. It’s reliable and doesn’t require fancy equipment.
Deep Cleaning for Stubborn Residues
Sometimes basic cleaning isn’t enough, especially after heavy use with waxes or sealants. For deep cleaning, start by preparing a stronger solution: mix soap with a bit of baking soda for mild abrasion. Soak the brush longer, up to 30 minutes, and use a soft brush to scrub between bristles. Rinse multiple times to ensure no soda residue remains, as it could affect future detailing.
For synthetic brushes exposed to chemicals, isopropyl alcohol diluted with water can cut through sticky residues. Apply it sparingly with a cloth, then follow with soapy water. Natural brushes benefit from conditioner after cleaning to restore softness mix a drop of hair conditioner in the final rinse.
From dealing with brushes gummed up by tire dressings, I’ve learned that gentle agitation is better than force. Over-scrubbing can fray ends, reducing precision. Always test on a small area if using new cleaners.
“Patience in cleaning tools pays off in the quality of your work,” notes car detailer Sarah Jenkins, drawing from her shop experiences where brushes see daily action.
Cleaning Different Brush Types
Each brush type needs a tailored approach. For natural hair brushes, use lukewarm water and mild soap to preserve oils. Avoid hot water, which can make them brittle. After drying, comb through with a wide-tooth comb to align hairs.
Synthetic brushes handle warmer water and stronger soaps fine, but skip conditioners as they might leave films. Wheel brushes, often with stiffer bristles, benefit from soaking in degreaser solutions for brake dust removal. Vent brushes, being slim, dry faster but need careful rinsing to clear narrow gaps.
Based on handling various types, I recommend labeling brushes by material to remember care instructions. This prevents mix-ups and extends their use. For example, a boar bristle brush cleaned harshly once lost its fluffiness, teaching me to be mindful.
Common Mistakes to Avoid
It’s easy to make errors when learning how to clean car detailing brush. One big one is using household cleaners with bleach or ammonia, which degrade bristles over time. Another is drying brushes upright, letting water seep into the handle and cause rot or loosening.
Forgetting to rinse completely leaves soap films that attract more dirt. Twisting or wringing bristles harshly breaks them. Also, storing wet brushes in closed bags promotes mildew.
From observing others and my own slip-ups, these pitfalls shorten tool life. Instead, pat dry and store in open air. If brushes smell musty, it’s a sign of poor drying check ventilation.
| Mistake | Consequence | Fix |
|---|---|---|
| Harsh chemicals | Bristle damage | Use mild soap |
| Incomplete rinse | Residue buildup | Rinse until clear |
| Wet storage | Mold growth | Air dry fully |
This table highlights key issues for quick reference.
Maintenance Tips for Longevity
Beyond cleaning, maintenance keeps brushes performing well. After each use, give a quick rinse if possible. Weekly inspections catch early buildup. Store them hanging or in organizers to avoid bending.
Rotate brushes for different tasks to even wear. Apply protective sprays sparingly if recommended by manufacturers. In cold weather, avoid freezing by storing indoors.
Over time, I’ve built habits like these, and my brushes last years instead of months. It’s about consistency small efforts add up.
Tools and Accessories That Help
While basic items suffice, some accessories enhance the process. Brush combs remove tangles post-cleaning. Drying racks ensure even airflow. Microfiber cloths wick moisture without lint.
Ultrasonic cleaners offer hands-free deep cleaning for pros, vibrating dirt away. But for most, a simple setup works. Choosing quality brushes upfront makes cleaning easier too.
Eco-Friendly Cleaning Options
For those mindful of the environment, natural alternatives shine. Use castile soap instead of synthetic detergents. Vinegar and baking soda replace chemical disinfectants. Collect rinse water for plants if soap is biodegradable.
These methods reduce plastic waste from disposables. From switching to them myself, I noticed no drop in effectiveness, plus better for waterways.
“Choosing green options in car care benefits both your vehicle and the planet,” shares environmental advocate Tom Rivera, who promotes sustainable detailing practices.
Frequently Asked Questions
How often should I clean my car detailing brushes?
Aim for after every major use or weekly if used frequently. Light tasks might allow bi-weekly cleaning, but watch for visible dirt.
Can I put detailing brushes in the dishwasher?
No, the heat and agitation can warp handles and damage bristles. Stick to hand washing for safety.
What if my brush still smells after cleaning?
Soak in a vinegar-water mix for 15 minutes, then rinse. If persistent, it might need replacement due to deep-set bacteria.
Are there brushes that don’t need cleaning?
All brushes accumulate debris, so regular care is necessary regardless of type.
How do I know when to replace a brush?
Look for frayed bristles, loose hairs, or if it no longer holds shape after cleaning. Typically, good ones last 1-2 years with proper care.
Conclusion
Wrapping up, mastering how to clean car detailing brush ensures your tools stay reliable for that perfect shine. By following these steps and tips, you’ll avoid common issues and enjoy longer-lasting equipment. Remember, consistent care reflects in your car’s appearance, making every detailing session more effective. Keep experimenting gently, and your brushes will thank you with better performance.