
How to Clean And Restore Rubber Car Mats Like a Pro
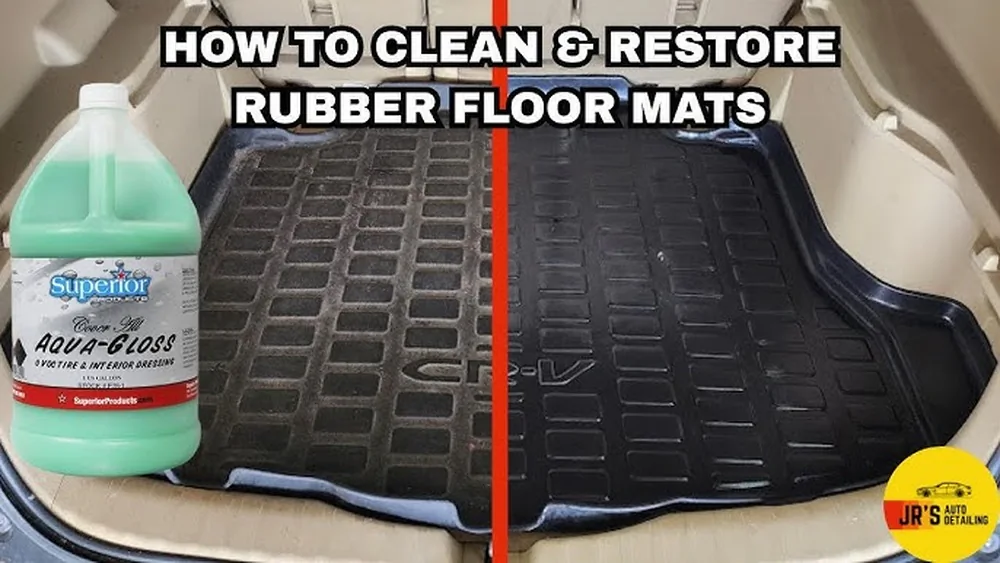
Rubber car mats are a simple but important part of keeping your car clean. They protect the floor from dirt, water, and spilled drinks. Over time, though, these mats can get very dirty and even look old or faded. If you know the right way to clean and restore rubber car mats, you can make them look almost new again.
This not only keeps your car looking good but also helps your mats last longer. Let’s explore the best steps, products, and tricks to clean and restore rubber car mats with great results—even if you have never done it before.
Why Clean And Restore Rubber Car Mats?
Rubber mats do more than just trap mud and debris. They protect your car’s interior from stains, water damage, and bad smells. Dirty mats can start to look gray and may even become slippery, which is unsafe. Cleaning and restoring them gives you:
- Better appearance: Clean mats make your car feel fresh and well-kept.
- Longer lifespan: Dirt and salt can break down rubber over time. Cleaning prevents early damage.
- Improved safety: Restored mats have better grip, so your feet don’t slip.
- Healthier environment: Clean mats reduce mold, bacteria, and allergens inside your car.
Many car owners just shake off dirt or quickly rinse their mats, but this is not enough. Dirt, oils, and road salts can stick to the rubber and damage it slowly. A full clean and restore routine is the best way to protect your investment.
Tools And Products You’ll Need
Before you start, gather the right tools and products. Using the correct items makes cleaning easier and gives better results. Here’s what most people need:
- Vacuum cleaner (with hose/brush attachment)
- Stiff-bristled brush (not metal)
- Bucket of warm water
- Mild dish soap or a special rubber mat cleaner
- Degreaser (optional for tough stains)
- Microfiber towels or soft cloths
- Spray bottle (for applying cleaner)
- Rubber protectant (such as 303 Aerospace Protectant or Meguiar’s Natural Shine)
- Soft sponge or pad (for applying protectant)
- Garden hose (for rinsing)
Some people use a pressure washer, but this is only safe if you keep the pressure low. Too much force can damage the mats or remove factory finishes.
| Tool/Product | Main Purpose | Pro Tip |
|---|---|---|
| Stiff-bristled brush | Scrubbing dirt and grime | Use circular motions for stuck-on dirt |
| Rubber protectant | Restoring color and UV protection | Apply in thin, even layers |
| Microfiber towel | Drying and buffing | Prevents lint on mats |

Credit: www.chemicalguys.com
Step-by-step: How To Clean Rubber Car Mats
1. Remove Mats And Shake Out Loose Dirt
Start by removing all rubber mats from your car. Shake them outside to get rid of any loose dirt, stones, or leaves. This makes the washing process easier and keeps dirt from getting trapped in your car.
2. Vacuum Thoroughly
Use a vacuum with a hose or brush attachment to remove any leftover debris. Pay close attention to grooves or textured areas where dirt hides. Vacuuming before washing prevents muddy water and makes scrubbing more effective.
3. Rinse The Mats
Lay the mats flat on the ground or hang them over a railing. Rinse both sides with a garden hose. Warm water works best for loosening stuck-on grime. If you use a pressure washer, make sure the pressure is under 1200 PSI and hold the nozzle at least a foot away from the mat.
4. Apply Soap Or Cleaner
Mix a few drops of mild dish soap with warm water in a bucket. If you have a special rubber mat cleaner, follow the directions on the label. Spray or pour the soapy water onto each mat.
5. Scrub The Surface
Use a stiff-bristled brush to scrub the mats, paying attention to grooves and textured spots. Move the brush in small circles for best results. For very dirty spots or oily stains, use a degreaser and let it sit for a few minutes before scrubbing.
Non-obvious tip: Scrub the edges and underside of the mats, too. Many people forget these areas, but dirt and salt can collect there and spread to the top.
6. Rinse Again
Rinse the mats thoroughly to remove all soap and dirt. Leftover soap can make mats slippery and attract more dirt. Check that water runs clear before you finish rinsing.
7. Dry Completely
Shake off extra water and lay the mats flat in a sunny spot or hang them to air dry. Don’t put wet mats back in the car—they can cause mold and a musty smell. Avoid using a hair dryer or heater, which can damage rubber.
Insight: Rubber mats may look dry on the surface but stay damp in grooves. Always check by pressing with a dry towel before moving to the next step.
How To Restore Rubber Car Mats
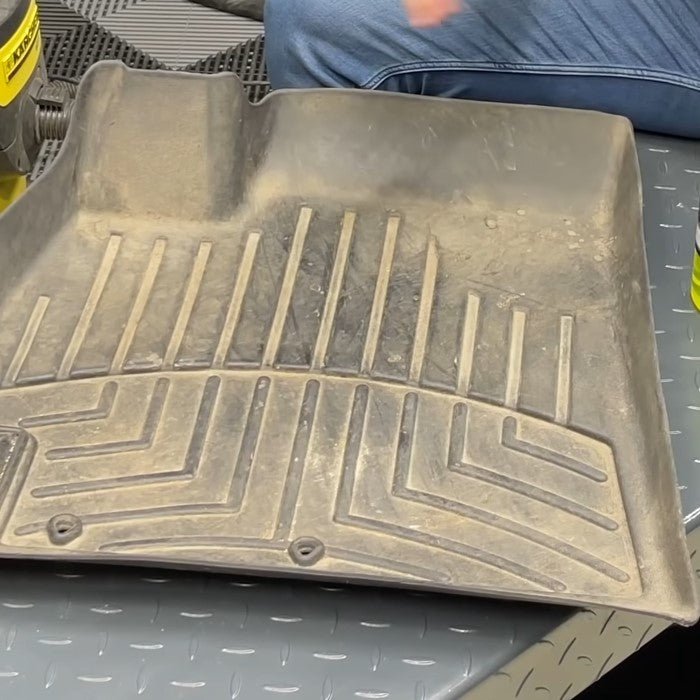
Cleaning removes dirt, but restoration brings the mats back to their original color and shine. Over time, rubber can fade, crack, or become dull from sunlight and chemicals. Here’s how to restore them:
1. Inspect For Damage
Check each mat for cracks, deep stains, or worn spots. If a mat is badly cracked or has lost flexibility, it may need to be replaced.
2. Choose A Quality Rubber Protectant
A rubber protectant adds shine and UV protection. It helps the mat resist fading and cracking. Good brands include 303 Aerospace Protectant, Meguiar’s Natural Shine, and Chemical Guys VRP.
Avoid products with silicone oil. These can make the mats slippery and attract more dust.
| Protectant Brand | Main Benefit | Slippery Finish? |
|---|---|---|
| 303 Aerospace | UV protection, non-greasy | No |
| Meguiar’s Natural Shine | Restores black color, easy to apply | No |
| Armor All Original | Shiny finish, budget-friendly | Yes |
3. Apply The Protectant
Spray the protectant onto a clean sponge or microfiber towel, not directly onto the mat. This ensures even coverage. Rub the product into the mat using small, circular motions. Pay extra attention to faded or worn areas.
Let the protectant sit for 5–10 minutes, then buff off any extra with a clean towel. This step keeps mats from feeling greasy.
4. Let Mats Cure
Allow the mats to air dry for at least 30 minutes before putting them back in your car. This prevents the product from rubbing off onto shoes or carpets.
Credit: auto-glanz.co.uk
Tips For Keeping Rubber Car Mats Looking New
- Clean mats monthly: Regular cleaning stops dirt from becoming hard to remove.
- Avoid harsh chemicals: Strong cleaners or bleach can dry out and crack rubber.
- Use protectant every 2–3 months: This keeps mats flexible and stops fading.
- Rotate mats: If possible, swap front and back mats to wear them evenly.
- Check for salt build-up in winter: Salt can eat away at rubber, so wash mats more often in snowy climates.
Many people are surprised to learn that letting mats air dry in direct sunlight can actually help “bake in” the protectant, making it last longer. Just don’t leave them out all day in hot weather, as extreme heat may warp the rubber.
Common Mistakes To Avoid
- Using the wrong cleaner: Not all household cleaners are safe for rubber. Read labels and avoid products with bleach or ammonia.
- Skipping drying time: Wet mats can cause mold or slip hazards in your car.
- Applying too much protectant: Thick layers make mats greasy. Less is more.
- Forgetting to clean the car’s carpet: Dirt under mats can work its way back onto clean mats.
| Mistake | Why It’s a Problem | How to Avoid |
|---|---|---|
| Skipping vacuuming | Dirt turns into mud during washing | Always vacuum first |
| Using silicone sprays | Leaves slippery surface, unsafe | Choose water-based protectants |
| Not drying mats | Risk of mold, musty smell | Dry completely before reinstalling |
Eco-friendly Options
If you want to clean your mats in a more eco-friendly way, try these alternatives:
- Use a mixture of vinegar and water (50: 50) for cleaning. Vinegar breaks down dirt but is safe for rubber.
- Choose biodegradable, plant-based cleaners.
- Collect rinse water and pour it onto soil, not down storm drains, to avoid pollution.
Remember, even eco-friendly cleaners should be rinsed off completely to avoid attracting dirt.
When To Replace Rubber Car Mats
No matter how well you clean and restore, some mats eventually wear out. Replace your rubber car mats if you see:
- Deep cracks or splits
- Large areas where rubber feels brittle
- Stains that won’t come out after several cleanings
- Mats that no longer fit the floor properly
Investing in new mats protects your car’s interior and keeps driving safe.
How Professional Detailers Clean Rubber Mats
Professional car detailers often use a few extra steps for top results:
- Hot water extractors to remove deep grime
- Steam cleaners for tough stains and bacteria
- Commercial-grade protectants for longer-lasting shine
While these tools can give a showroom finish, you can achieve excellent results at home with patience and the right products.
For more advanced tips and research on car mat cleaning, you can check the Consumer Reports guide.
Frequently Asked Questions
How Often Should I Clean My Rubber Car Mats?
It’s best to clean your mats once a month. If you live in a place with a lot of rain, snow, or mud, clean them more often to prevent stains and damage.
What Is The Best Cleaner For Rubber Car Mats?
A mild dish soap mixed with warm water works for most mats. For stubborn stains, use a degreaser or a product made for rubber, like 303 Multi-Surface Cleaner.
Can I Use A Pressure Washer On Rubber Mats?
Yes, but be careful. Use low pressure (under 1200 PSI) and keep the nozzle about a foot away to avoid damaging the rubber.
Why Do My Mats Look Faded Even After Cleaning?
Sunlight and harsh chemicals can make rubber look faded. Using a rubber protectant after cleaning will restore color and provide UV protection.
Are Silicone Sprays Safe For Rubber Mats?
It’s better to avoid them. Silicone sprays can make mats slippery and attract dirt. Choose a water-based protectant instead for safety and a natural finish.
With the right care, your rubber car mats can look great and last for years. Regular cleaning and restoration not only protect your car’s value but also make driving more pleasant every day.

Credit: www.youtube.com
Related posts
 Why You Should Use a Foam Cannon for Car Washing: Ultimate Guide
Washing your car is more than just making it look good. It protects the paint, keeps the value high, and makes driving feel better. But if…
 How to Clean Leather Seats Without Damaging Them: Expert Tips
Keeping your leather seats clean can be a challenge. Leather looks beautiful and feels luxurious, but it needs special care. Many people worry about damaging their…
 Why Using a Ceramic Coating Spray is Important for Your Car’s Shine
If you care about your car’s appearance and value, you probably wash and wax it regularly. But did you know there’s a better way to protect…