
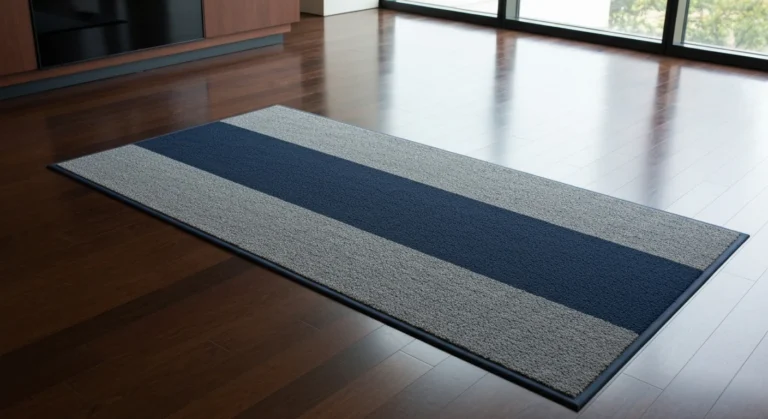
How to Maintain Rubber Floor Mats for Lasting Durability
Maintaining rubber floor mats involves a simple but consistent routine of cleaning, rinsing, and protecting them. This process helps remove dirt, grime, and spills that can degrade the rubber over time, keeping your mats looking fresh and extending their lifespan.
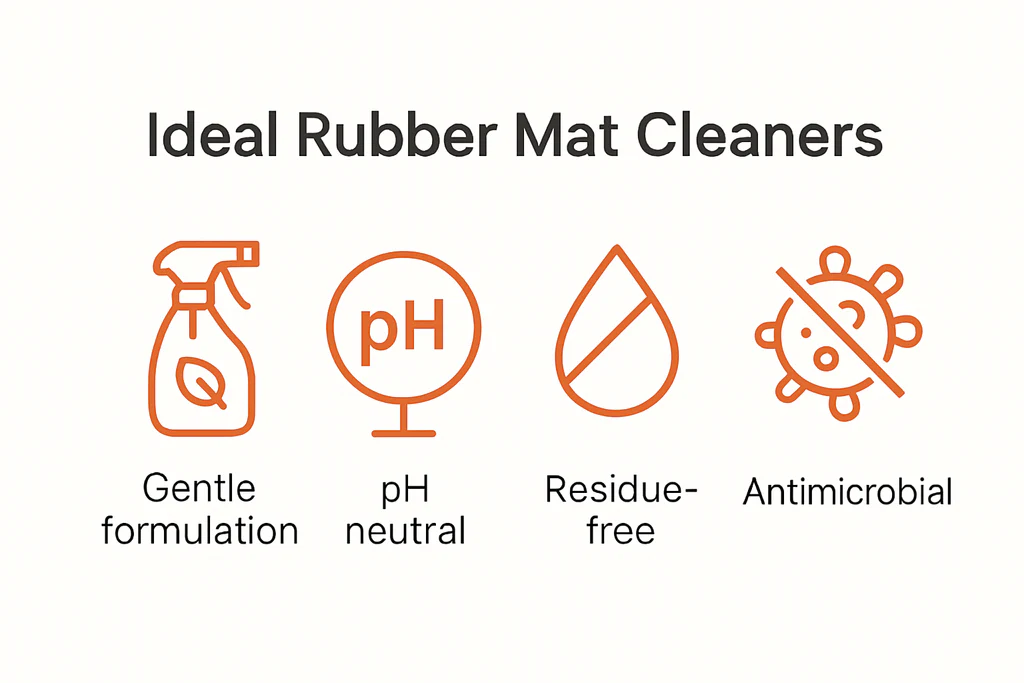
The key is to use gentle, pH-neutral cleaners and avoid harsh chemicals that can dry out or damage the material. Proper drying is also crucial to prevent mildew and unpleasant odors.
Safety checks
- Regular cleaning with gentle, pH-neutral solutions is key to rubber mat longevity.
- Thorough rinsing and complete drying prevent damage and odors.
- Protection products can restore shine and guard against UV and wear.
- Avoid harsh chemicals, solvents, and abrasive tools that can degrade rubber.
| Topic | When it helps | What to keep in mind |
|---|---|---|
| Step 1 | All types of rubber mats, as a crucial first step for any cleaning. | Don’t skip this step; wet dirt can turn into muddy residue that’s harder to scrub away. |
| Step 2 | Routine cleaning and removing general grime without damaging the rubber. | Avoid harsh detergents, degreasers, or abrasive cleaners, as these can dry out, discolor, or degrade the rubber over time. |
| Step 3 | Ensuring a clean finish and preventing residue buildup. | Incomplete rinsing can lead to sticky mats or a streaky appearance once dry. |
| Step 4 | Preventing mildew, odors, and premature rubber degradation. | Putting damp mats back can lead to mold, mildew, and a musty smell, especially in enclosed spaces like a car interior. |
| Step 5 | Extending mat life, restoring appearance, and adding a protective barrier. | Avoid silicone-based tire shines or greasy products that can make mats slippery and unsafe, especially for car pedals. |
The article must cover routine
Step 1. Remove Loose Debris and Vacuum
Start by taking your rubber mats out of the vehicle or off the floor. Shake them vigorously to dislodge loose dirt, dust, and small pebbles.
- All types of rubber mats, as a crucial first step for any cleaning.
- Don’t skip this step; wet dirt can turn into muddy residue that’s harder to scrub away.
- If mats are heavily soiled with mud, consider hosing them down first to remove the bulk before vacuuming.
- Frequency – Weekly or as needed.
- Tools – Shaker, vacuum.
Step 2. Wash with a Gentle, pH-Neutral Cleaner
Once loose debris is gone, wet the mats thoroughly with water. Mix a small amount of pH-neutral cleaner (like car wash soap or a dedicated rubber cleaner) with water according to product instructions.
- Routine cleaning and removing general grime without damaging the rubber.
- Avoid harsh detergents, degreasers, or abrasive cleaners, as these can dry out, discolor, or degrade the rubber over time.
- For stubborn spots, let the cleaner sit for a minute or two before scrubbing, but don’t let it dry on the mat.
- Cleaner Type – pH-neutral.
- Tools – Soft brush, sponge.

Step 3. Rinse Thoroughly to Remove All Soap
After scrubbing, rinse the mats completely with clean water. Use a hose or a bucket of fresh water to ensure all soap residue is washed away.
- Ensuring a clean finish and preventing residue buildup.
- Incomplete rinsing can lead to sticky mats or a streaky appearance once dry.
- Run your hand over the mat after rinsing; if it feels slippery, continue rinsing until the surface feels clean and free of.
- Method – Hose or bucket.
- Goal – No residue.
Step 4. Dry Completely and Naturally
This is a critical step. Hang the mats or lay them flat in a shaded, well-ventilated area to air dry completely.
- Preventing mildew, odors, and premature rubber degradation.
- Putting damp mats back can lead to mold, mildew, and a musty smell, especially in enclosed spaces like a car interior.
- If time is short, you can use a microfiber towel to absorb excess water, but always allow for air drying to finish.
- Drying Method – Air dry (shaded).
- Time – Several hours.
Step 5. Apply a Rubber Protectant or Conditioner
Once fully dry, consider applying a rubber protectant or conditioner. These products help restore the mat’s original luster, protect against UV damage, and repel dirt and water.
- Extending mat life, restoring appearance, and adding a protective barrier.
- Avoid silicone-based tire shines or greasy products that can make mats slippery and unsafe, especially for car pedals.
- Look for products specifically designed for rubber or interior plastics that offer UV protection and a non-greasy finish.
- Product Type – Rubber protectant/conditioner.
- Benefit – UV protection, shine, dirt repellency.
Why Regular Maintenance Matters for Rubber Mats
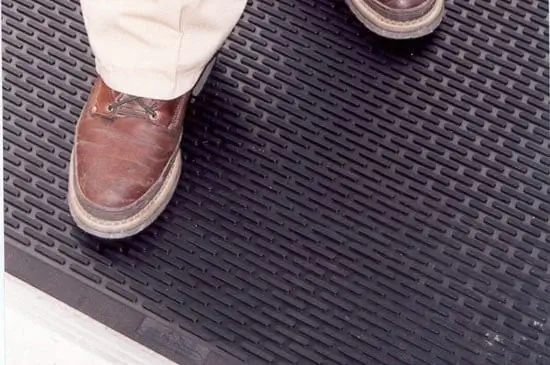
Rubber floor mats are designed to be tough, protecting your vehicle’s carpet or gym floor from dirt, moisture, and wear. However, their durability doesn’t mean they’re maintenance-free.
Regular cleaning and maintenance prevent this breakdown, preserving the mat’s flexibility and preventing it from becoming brittle or cracked. It also keeps your environment hygienic, preventing the buildup of bacteria and unpleasant odors, especially in damp conditions.
Imagine a car mat constantly exposed to mud, salt, and spills.
Ignoring spills or dirt for extended periods, allowing them to dry and become deeply embedded, which makes future cleaning much harder and can cause permanent staining or damage.Essential Supplies for Cleaning Rubber Mats
Having the right tools and cleaning agents on hand makes the maintenance process much easier and more effective. You likely have many of these items already, but a quick check ensures you’re prepared.
The most important consideration for cleaners is their pH level. Rubber is sensitive to harsh acids and alkalis, which can dry it out, cause discoloration, or accelerate its degradation.
Before you start, gather a bucket for water, a garden hose for rinsing, a soft-bristle brush for scrubbing, and a bottle of pH-neutral car wash soap.
Using abrasive scrub brushes or steel wool, which can scratch and damage the rubber surface, making it more prone to trapping dirt in the future.
- Garden Hose or Pressure Washer (low setting): For rinsing off loose dirt and soap.
- Buckets: One for soapy water, one for clean rinse water.
- Soft-Bristle Brush or Sponge: To gently scrub the mat’s surface without scratching.
- pH-Neutral Cleaner: Car wash soap, dedicated rubber cleaner, or a mild all-purpose cleaner diluted properly.
| Cleaning Agent Type | Suitability for Rubber Mats | Notes |
|---|---|---|
| pH-Neutral Car Wash Soap. | Excellent. | Gentle, effective, designed for vehicle surfaces. |
| Dedicated Rubber Cleaner. | Excellent. | Formulated specifically for rubber, often includes conditioners. |
| Mild All-Purpose Cleaner (diluted). | Good (test first). | Ensure it’s pH-neutral and heavily diluted to avoid residue. |
| Dish Soap (e.g., Dawn). | Use with caution. | Can be effective but may strip natural oils if used frequently or undiluted, potentially. |
Drying and Protecting for Longevity
The drying process is just as important as the cleaning itself. Improper drying can lead to a host of problems, from unpleasant odors to the degradation of the rubber material.
Once your mats are completely dry, consider adding a layer of protection. This step is often overlooked but can significantly impact the mat’s appearance and durability over time.
After cleaning, hang your car mats over a fence or laundry line in a shaded area.Placing damp mats back into a vehicle or on a floor, which creates a breeding ground for mold and mildew, leading to unpleasant odors and potential damage to the mat and surrounding surfaces.Air Dry in Shade: Always allow mats to air dry completely. Direct sunlight can cause.Elevate for Airflow: If possible, hang mats or prop them up to allow air to.Towel Dry Excess: For quicker drying, use a clean microfiber towel to wipe away as.Apply Protectant: Use a non-greasy, rubber-safe protectant or conditioner. This helps repel dirt, water, and.
Advanced Tips for Stubborn Stains and Restoration
Sometimes, routine cleaning isn’t enough to tackle deeply embedded dirt, scuff marks, or restore the original look of older mats. For these situations, a few advanced techniques can make a significant difference.
The goal is to be more aggressive with the cleaning action or product without harming the rubber. Always proceed with caution and test any new product or method on a small, hidden area first to ensure it doesn’t cause discoloration or damage.
For a stubborn grease stain on a garage mat, try a small amount of citrus-based cleaner (ensure it’s rubber-safe and test in an inconspicuous area first), scrubbing gently with a stiff nylon brush, then.
Using abrasive pads or harsh chemicals like paint thinners or strong solvents to remove tough stains, as these will almost certainly damage the rubber permanently.
- Stiff Nylon Brush: For heavily textured mats or deeply ingrained dirt, a slightly stiffer nylon.
- Steam Cleaner: A handheld steam cleaner can be effective for sanitizing and loosening stubborn dirt.
- Rubber Rejuvenators: Specialized rubber rejuvenator products can help restore the elasticity and color of faded.
- Spot Cleaning for Stains: For specific stains like oil or grease, a small amount of.
FAQs
How often should I clean my rubber floor mats?
The frequency depends on usage and exposure. For car mats, cleaning them monthly is a good general rule, or immediately after heavy exposure to mud, salt, or spills.
Can I use household cleaners like dish soap on rubber mats?
While mild dish soap (like Dawn) can be used occasionally for tough grime, it’s generally best to use a pH-neutral car wash soap or a dedicated rubber cleaner. Dish soap can strip natural oils.
How do I make my rubber floor mats look new again?
To make them look new, thoroughly clean them using a pH-neutral cleaner and a stiff nylon brush for deep scrubbing. After complete drying, apply a dedicated rubber protectant or conditioner.
What products should I avoid using on rubber floor mats?
Avoid harsh chemicals such as bleach, strong degreasers, petroleum-based solvents, silicone-heavy tire shines, and abrasive cleaners. These can dry out, discolor, crack, or make the rubber dangerously slippery.
Conclusion
Maintaining your rubber floor mats doesn’t have to be a complicated chore. By consistently following a few simple steps-from initial debris removal to thorough drying and protection-you can significantly extend their lifespan and keep them looking their best.
Remember that the right tools and gentle, pH-neutral cleaners are your best allies in this process. Avoiding harsh chemicals and ensuring complete drying will prevent common issues like cracking, fading, and unpleasant odors.
Related posts
 Why Use Custom-Fit Floor Mats for Your Car?
Discover why custom-fit floor mats are a worthwhile investment for your vehicle. Learn about superior protection, perfect fit, and enhanced interior value. Choosing custom-fit floor mats…
 How to Remove Mud from Rubber Floor Mats: A Step-by-Step Guide
Learn the easiest way to remove stubborn mud from your rubber floor mats. Follow these simple steps for a clean car interior. Mud on your rubber…
 How to Clean Floor Mats After Off-Roading: A Step-by-Step Guide
Learn how to effectively clean your car's floor mats after off-roading. Get step-by-step instructions for removing mud, dirt, and odors from rubber and carpet mats. After…