
How to Restore Car Paint at Home: Steps, Tips, and Common Mistakes
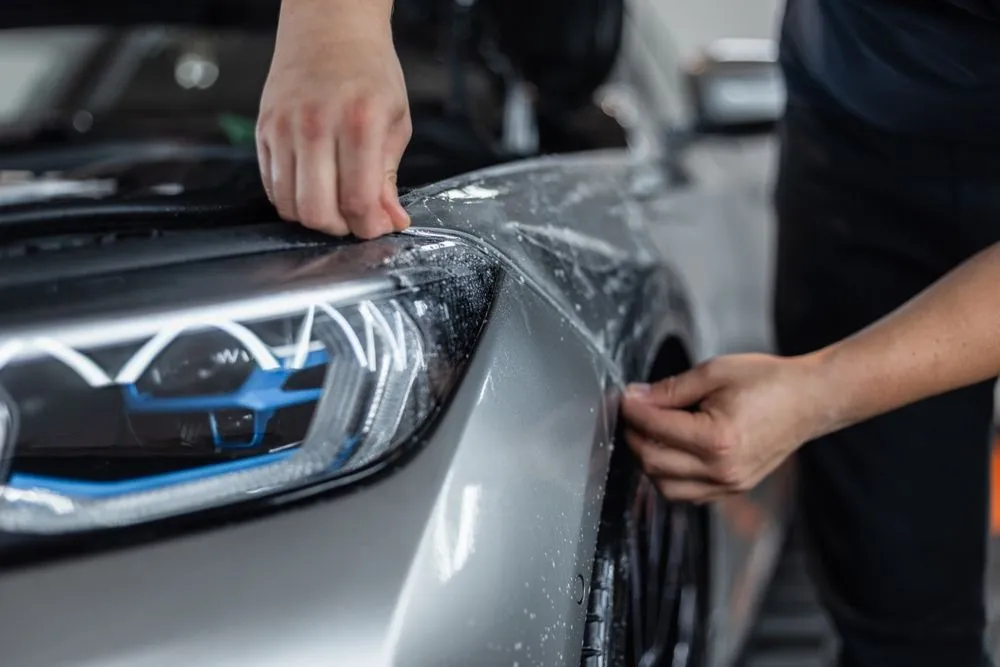
Restoring your car’s paint at home is a rewarding way to bring back its shine and protect its finish. With the right tools, products, and a bit of patience, you can remove light scratches, swirl marks, and oxidation. This process involves careful cleaning, decontamination, paint correction, and applying a protective layer. You can achieve professional-looking results without visiting a detailer, saving money and gaining satisfaction.
Understanding Your Car’s Paint Condition
Before you begin, it is important to look closely at your car’s paint. Different types of damage need different solutions. Knowing what you are dealing with helps you choose the right products and methods.
Common Types of Paint Damage
Car paint can suffer from various issues over time. Each problem affects the look and protection of your vehicle.
- Swirl Marks: These are fine scratches that look like spiderwebs, often caused by improper washing or drying. They are most visible in direct sunlight.
- Light Scratches: These are deeper than swirls but do not go through the clear coat. You can often feel them with your fingernail.
- Oxidation: This makes the paint look dull, chalky, or faded. It happens when the clear coat breaks down from sun exposure and age.
- Water Spots: Mineral deposits left behind by water that dries on the paint. These can etch into the clear coat if not removed quickly.
- Fading: The color loses its vibrancy, often due to prolonged sun exposure. This is common on older vehicles.
Assessing the Severity of Damage
To decide if home restoration is right for your car, check how bad the damage is. Run your fingernail gently across any scratches. If your nail catches deeply, the scratch might be too severe for home correction and could need professional help or repainting.
For oxidation, look at the paint’s dullness. If it feels rough or looks very faded, it will need more aggressive polishing. Light swirls and minor dullness are usually easy to fix at home.
Essential Tools and Materials You’ll Need
Having the right supplies makes the restoration process smoother and more effective. Gather everything before you start to avoid interruptions.
Cleaning and Decontamination Supplies
A clean surface is the first step to any good paint restoration. These items remove dirt and grime.
- Car Wash Soap: A pH-neutral car shampoo is best.
- Wash Mitts: Use two mitts, one for the top of the car and one for lower, dirtier areas.
- Microfiber Drying Towels: Soft, absorbent towels prevent new scratches during drying.
- Clay Bar Kit: This removes embedded dirt, tar, and industrial fallout from the paint surface.
- Iron Remover: A spray that dissolves iron particles, often from brake dust, that stick to the paint.
- All-Purpose Cleaner (APC): For cleaning tires, wheels, and stubborn spots.
Paint Correction Tools

These tools are for removing imperfections like swirls and scratches from the clear coat.
- Dual-Action (DA) Polisher: This machine rotates and oscillates, making it safer and easier for beginners than a rotary polisher.
- Polishing Pads: Different pads are used for compounding, polishing, and finishing. They come in various colors to indicate their aggressiveness.
- Compounds: More abrasive liquids used to remove deeper scratches and heavy oxidation.
- Polishes: Finer liquids used after compounds to refine the paint and remove lighter imperfections, leaving a smooth finish.
- Paint Prep Spray (IPA solution): Used to wipe down the paint between steps to remove polishing oils and check your work.
- Microfiber Towels: Many clean towels are needed for wiping off product residue.
Paint Protection Products
After correcting the paint, you need to protect it from future damage.
- Car Wax: Provides a warm glow and good protection, usually lasting a few months.
- Paint Sealant: A synthetic product offering longer-lasting protection than wax, often up to six months or more.
- Ceramic Coating: Offers the most durable protection, creating a hard layer that can last for years. It requires careful application.
Safety Gear
Always protect yourself during the process.
- Gloves: Protect your hands from chemicals.
- Safety Glasses: Guard your eyes from splashes or dust.
| Category | Item | Purpose |
|---|---|---|
| Cleaning | Car Wash Soap | Removes loose dirt and grime |
| Wash Mitts | Gentle washing without scratching | |
| Microfiber Drying Towels | Absorbs water without leaving marks | |
| Decontamination | Clay Bar Kit | Lifts embedded contaminants |
| Iron Remover | Dissolves iron particles | |
| Correction | Dual-Action Polisher | Safely removes paint defects |
| Polishing Pads (various) | Applies compounds and polishes | |
| Compound | Removes heavy scratches/oxidation | |
| Polish | Refines paint, removes light swirls | |
| Paint Prep Spray | Removes oils, reveals true finish | |
| Protection | Car Wax / Sealant / Ceramic Coating | Adds a protective layer and shine |
| Safety | Gloves, Safety Glasses | Protects hands and eyes |
Step-by-Step Guide to Restoring Car Paint
Follow these steps carefully to achieve the best results. Work in a shaded area, out of direct sunlight, to prevent products from drying too quickly.
Step 1: Thorough Cleaning
A clean surface is crucial. Any dirt left behind can cause new scratches during the restoration process.
- Wash the Car: Use a two-bucket method. Fill one bucket with soapy water and the other with clean rinse water. Dip your wash mitt in the soapy water, wash a section, then rinse the mitt in the clean water before getting more soap. This keeps dirt out of your soap bucket.
- Rinse Thoroughly: Make sure all soap is removed.
- Dry the Car: Use soft microfiber drying towels. Pat the car dry, do not drag the towel across the paint.
Step 2: Paint Decontamination
This step removes contaminants that washing alone cannot. These particles can feel rough on the paint and hinder polishing.
- Apply Iron Remover: Spray the iron remover over the entire car. Let it sit for a few minutes as directed by the product. You will see purple spots where it reacts with iron particles. Rinse thoroughly.
- Use a Clay Bar: Knead a piece of clay into a flat disc. Spray a clay lubricant on a small section of the paint. Gently glide the clay bar over the lubricated area. You will feel it grab at first, then glide smoothly as it picks up contaminants.
- Fold and Repeat: As the clay gets dirty, fold it to expose a clean surface. Continue this process over the entire car, working in small sections.
- Wipe Down: After each section, wipe the area clean with a microfiber towel.
Step 3: Paint Correction (Polishing)
This is where you remove the imperfections from the clear coat. Take your time and be patient.
- Turn the polisher on to a low speed, spread the product over the section.
- Increase the speed to medium (usually 4-5 on a DA polisher).
- Use slow, overlapping passes, moving horizontally then vertically. Apply light to moderate pressure.
- Work the product until it becomes clear or almost disappears. This usually takes 3-5 passes.
Step 4: Paint Protection
Once the paint is corrected, you need to protect it from the elements and keep it looking good.
- Choose Your Protection: Decide between wax, sealant, or ceramic coating. Wax is easiest to apply, sealant offers more durability, and ceramic coating provides the longest protection but needs careful application.
- Apply Wax or Sealant: Apply a thin, even layer of your chosen product using an applicator pad. Work in small sections. Let it haze over according to product instructions (usually 5-15 minutes).
- Buff Off: Use a clean, soft microfiber towel to gently buff off the residue until the paint shines. Flip the towel often to a clean side.
- Apply Ceramic Coating (if chosen): Follow the specific instructions for your ceramic coating product very carefully. These often involve precise application, leveling, and curing times. This step is more advanced and requires a very clean, dust-free environment.
Common Mistakes to Avoid
Avoiding these errors will help you get better results and prevent damage to your car’s paint.
- Working in Direct Sunlight: Heat causes products to dry too quickly, making them hard to remove and potentially leaving streaks or holograms. Always work in a shaded area or a garage.
- Using Dirty or Wrong Products/Pads: Dirty pads can introduce new scratches. Using an overly aggressive compound or pad on light defects can remove too much clear coat. Always use clean pads and match the product to the defect.
- Applying Too Much Pressure with a Polisher: Excessive pressure can generate too much heat, burn through the clear coat, or cause holograms. Let the machine do the work with light to moderate pressure.
- Skipping Decontamination: If you do not remove embedded contaminants, you will be rubbing them into your paint during polishing, causing more scratches.
- Not Cleaning Pads Regularly: Polishing pads collect paint residue and product. Clean them frequently during the process or switch to fresh pads to maintain effectiveness and prevent scratching.
- Using Household Cleaners: Never use dish soap or other household cleaners on your car’s paint. They can strip waxes, dry out rubber, and damage the clear coat.
- Not Taping Off Trim: Polishing compounds can stain plastic trim and rubber seals. Use painter’s tape to cover these areas before polishing.
Maintaining Your Restored Paint
After all your hard work, proper maintenance will keep your car looking its best for longer.
Regular Washing
Wash your car regularly, ideally every 1-2 weeks. Use a pH-neutral car shampoo and the two-bucket method. This prevents dirt and grime from building up and etching into the paint.
Proper Drying
Always dry your car with soft microfiber towels immediately after washing. Do not let water spots dry on the paint, especially in the sun. Consider using a leaf blower or a dedicated car dryer for touchless drying.
Reapplying Protection
The protective layer you applied will wear off over time. Reapply wax every 2-3 months, sealant every 4-6 months, or follow the maintenance schedule for your ceramic coating. This keeps the paint protected and maintains its shine.
FAQs
Is it worth restoring car paint at home?
Yes, for light to moderate damage like swirl marks, minor scratches, and oxidation, restoring car paint at home is very worthwhile. It saves money compared to professional detailing and gives you a great sense of accomplishment. For very deep scratches or extensive clear coat failure, professional help might be better.
How much does it cost to restore car paint at home?
The initial cost can range from $100 to $400, depending on whether you need to buy a polisher. If you already have a polisher, the cost for compounds, polishes, pads, and protection products might be $50-$150. This is much less than professional services, which can cost $300-$1000 or more.
Can I restore heavily oxidized paint myself?
You can often restore heavily oxidized paint at home, but it requires more effort. You will likely need a more aggressive compound and pad combination. It might take several passes to remove the dull, chalky layer and reveal the healthy paint underneath. Always start with a test spot to ensure you are getting good results without damaging the paint.
How long does a home paint restoration last?
The results of a home paint restoration can last for many months to several years, depending on how well you maintain the paint afterward. The protective layer (wax, sealant, or ceramic coating) is key. Regular washing and reapplying protection will extend the life of your restoration significantly.
What’s the difference between compounding and polishing?
Compounding uses a more abrasive liquid to remove deeper paint defects like heavy scratches and severe oxidation. It cuts into the clear coat more aggressively. Polishing uses a finer abrasive liquid to refine the paint after compounding, removing lighter swirls and hazing, leaving a smooth, glossy finish. You typically use a compound first, then follow with a polish.
Conclusion
Restoring your car’s paint at home is a rewarding project that can dramatically improve its appearance and protect its finish. By following the steps of thorough cleaning, decontamination, careful paint correction, and applying a protective layer, you can achieve impressive results. Remember to work in the shade, use the right tools, and avoid common mistakes to ensure a successful outcome. Take pride in bringing back your car’s original shine and enjoy its renewed look.
Related posts
 Why Use Custom-Fit Floor Mats for Your Car?
Discover why custom-fit floor mats are a worthwhile investment for your vehicle. Learn about superior protection, perfect fit, and enhanced interior value. Choosing custom-fit floor mats…
 How to Remove Mud from Rubber Floor Mats: A Step-by-Step Guide
Learn the easiest way to remove stubborn mud from your rubber floor mats. Follow these simple steps for a clean car interior. Mud on your rubber…
 How to Clean Floor Mats After Off-Roading: A Step-by-Step Guide
Learn how to effectively clean your car's floor mats after off-roading. Get step-by-step instructions for removing mud, dirt, and odors from rubber and carpet mats. After…