Learn how to install jeep dash storage box step by step with simple tools. Clear instructions for a secure, rattle-free fit.
Adding extra storage to your Jeep dashboard is one of the simplest ways to make daily driving more practical. If you are planning to install jeep dash storage box, the process is usually straightforward and can be done at home with basic tools. This guide explains everything you need to know, from choosing the right storage box to completing a clean and secure installation.
Whether you drive a Wrangler, Gladiator, or another Jeep model, a dash storage box helps keep small items organized and within reach. This article walks through each step clearly, highlights common mistakes, and gives you practical tips so your installation looks factory-fitted and stays secure over time.
What Is a Jeep Dash Storage Box and Why Install One
A Jeep dash storage box is an aftermarket or OEM accessory designed to add extra storage space on your dashboard. It typically fits into an existing dash tray or replaces a factory panel.
Why people install one
- Keeps small items organized such as keys, sunglasses, or tools
- Reduces clutter in the cabin
- Improves accessibility while driving
- Adds a rugged or customized look
Some models include lids for privacy, while others remain open for quick access.
Common types
- Clip-in storage trays
- Screw-mounted storage boxes
- Lockable dash compartments
- Modular systems with dividers
Before starting installation, it helps to understand what type you have, as the steps may vary slightly.
Tools and Materials You Will Need
Most installations do not require advanced tools. Having everything ready saves time and avoids interruptions.
Basic tool checklist
| Tool or Material | Purpose |
|---|---|
| Screwdriver set | Tightening mounting screws |
| Trim removal tool | Removing dash panels safely |
| Cleaning cloth | Preparing the surface |
| Isopropyl alcohol | Cleaning for adhesive installs |
| Mounting hardware | Securing the storage box |
If your kit includes adhesive strips instead of screws, you may not need a screwdriver. Always check the product instructions.
How to Install Jeep Dash Storage Box Step by Step
This section covers the general process for most Jeep models. Always follow any specific instructions provided with your storage box.
Step 1: Prepare the dashboard area
Start by clearing the dashboard. Remove any loose items, dust, or debris.
- Use a clean cloth to wipe the surface
- If adhesive is used, clean with alcohol for better bonding
- Make sure the surface is dry before continuing
A clean surface helps prevent rattling and improves long-term stability.
Step 2: Remove the existing panel or tray
Some Jeep models have a factory tray that needs to be removed.
- Use a trim removal tool to gently pry the panel
- Avoid using excessive force to prevent scratches
- Set the removed parts aside in case you need them later
If your model already has an open tray, you may skip this step.
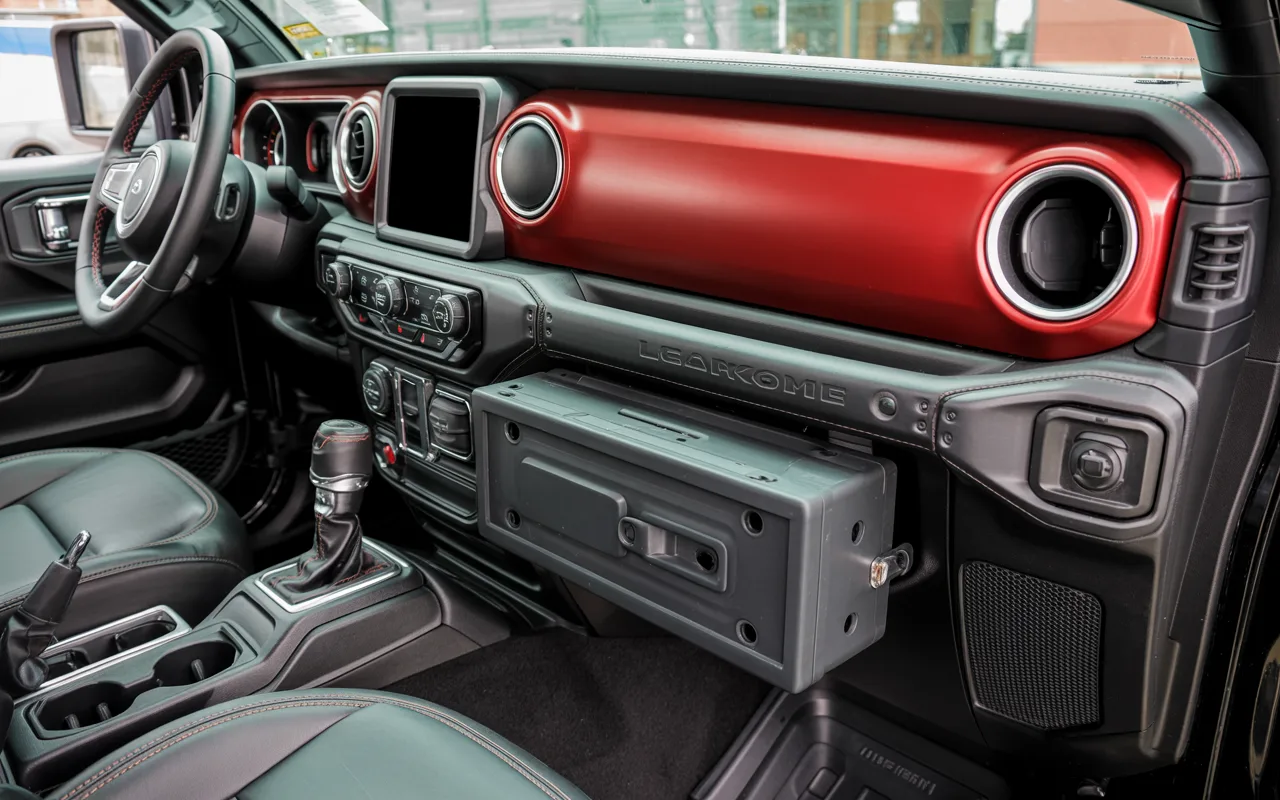
Step 3: Test fit the storage box
Before securing anything, place the storage box into position.
- Check alignment with mounting holes or edges
- Ensure it sits flush with the dashboard
- Confirm that it does not block vents or controls
This step helps you catch fitment issues early.
Step 4: Secure the storage box
Depending on the design, you will either use screws or adhesive.
For screw-mounted boxes
- Align the box with the mounting points
- Insert screws and tighten evenly
- Do not overtighten, as this can crack plastic
For adhesive-mounted boxes
- Peel off the adhesive backing
- Press firmly into place for at least 30 seconds
- Allow time for the adhesive to cure before use
Step 5: Final checks
After installation, inspect everything carefully.
- Check for movement or looseness
- Open and close the lid if applicable
- Drive briefly to listen for rattles
If everything feels solid, the installation is complete.
Installation Differences by Jeep Model
Not all Jeep dashboards are identical. While the general process remains similar, small differences can affect installation.
Model-specific considerations
| Jeep Model | Installation Notes |
|---|---|
| Wrangler JK | May require panel removal |
| Wrangler JL | Often supports direct fit accessories |
| Gladiator JT | Similar to JL with minor trim differences |
| Cherokee | Limited dash tray compatibility |
Always confirm compatibility before buying a storage box.

Common Mistakes to Avoid
Even a simple install can go wrong if you overlook small details. Here are the most common issues and how to prevent them.
Skipping surface cleaning
Dust or grease reduces adhesive strength and may cause the box to loosen over time.
Overtightening screws
Too much force can crack plastic or strip threads. Tighten just enough to secure.
Ignoring fitment issues
If the box does not sit properly during test fitting, forcing it into place can damage the dashboard.
Blocking vents or controls
Make sure airflow and visibility are not affected.
Not allowing adhesive to cure
Using the storage box immediately after installation can weaken the bond.
Tips for a Clean and Secure Installation
A few extra steps can make your installation look more professional and last longer.
Use protective tools
Plastic trim tools prevent scratches compared to metal tools.
Work in a warm environment
Adhesives bond better in moderate temperatures.
Check alignment twice
Taking a moment to double-check positioning avoids rework.
Add anti-slip lining
Some users place a rubber liner inside the box to reduce noise.
Inspect after a few days
Check screws or adhesive after initial use to ensure everything stays secure.
Pros and Limitations of Adding a Dash Storage Box
Before installing, it helps to understand both the benefits and potential downsides.
Advantages
- Easy installation for most users
- Improves interior organization
- Enhances convenience during driving
- Available in many styles and sizes
Limitations
- Limited storage capacity
- Some models may not fit perfectly
- Adhesive versions may loosen over time in extreme heat
When You Might Need Professional Help
Most people can complete this installation themselves. However, consider assistance if:
- You are unsure about removing dashboard panels
- Your Jeep has custom modifications
- Electrical components are near the installation area
A professional installer can ensure a clean fit without risking damage.
FAQ
How long does it take to install a Jeep dash storage box?
Most installations take 15 to 30 minutes, depending on the mounting method and vehicle model.
Do I need special tools for installation?
No. Basic tools like a screwdriver and trim tool are usually enough.
Can I remove the storage box later?
Yes. Screw-mounted boxes are easy to remove. Adhesive ones may leave residue that needs cleaning.
Will installing a dash storage box damage my Jeep?
Not if installed correctly. Avoid overtightening screws and use proper tools to prevent scratches.
Are all dash storage boxes universal?
No. Many are designed for specific Jeep models, so compatibility matters.
Does adhesive hold well in hot climates?
Quality adhesive works well, but extreme heat can weaken it over time. Proper surface preparation helps.
Conclusion
Installing a dash storage box is a simple upgrade that improves everyday usability without major effort. By following the correct steps, preparing the surface properly, and choosing the right mounting method, you can install jeep dash storage box securely and neatly.
Take your time during alignment and final checks to avoid common mistakes. Once installed, you will have a more organized and practical dashboard setup.
For your next upgrade, consider exploring other interior mods that improve comfort and storage without complicated installation.