If you’re looking to make getting in and out of your Jeep Wrangler JL easier while adding some extra protection and style, learning to install side step rails on Jeep JL models can be a straightforward project. This guide walks you through the process step by step, covering everything from choosing the right type to the actual setup, so you can handle it yourself with confidence and save on shop fees.
Adding side step rails to your Jeep JL can change how you use your vehicle every day. These accessories provide a solid place to step when entering or exiting, especially if your Jeep has a lift kit or larger tires that make the cabin higher off the ground. They also offer some shielding for the sides of your body against rocks, branches, or other debris you might encounter on trails or even in parking lots. For many Jeep owners, this upgrade combines practicality with a tougher look that fits the Wrangler’s spirit.
Think about why so many people choose to install side step rails on Jeep JL Wranglers. The JL series, which started in 2018, comes in two-door and four-door versions, and both can benefit from this addition. If you have kids, elderly passengers, or just want to avoid stretching awkwardly to climb in, these rails make a big difference. Plus, they can help preserve the paint and underbody by taking hits that would otherwise damage more critical parts.
Before diving into the installation, it’s worth noting that not all side step rails are the same. Some are designed for heavy off-road use, while others focus more on daily convenience. Picking the one that matches your driving habits will ensure you get the most out of this project. We’ll cover types, tools, and tips to help you decide and complete the job smoothly.
Why Add Side Step Rails to Your Jeep JL?
There are plenty of reasons to consider adding side step rails to your Jeep JL. First off, they improve accessibility. The Wrangler JL sits pretty high, and without steps, hopping in can feel like a workout. With rails in place, everyone from short folks to those carrying gear can step up easily. This is especially helpful for families or anyone who uses their Jeep for more than just weekend adventures.
Another big plus is protection. Side step rails act as a barrier between your Jeep’s body and the outside world. On rough paths, they can deflect stones or sticks that might dent your doors or scratch the paint. Even in urban settings, they guard against dings from other cars in tight spaces. Many models also come with textured surfaces to prevent slipping, which adds safety in wet or muddy conditions.
“I love how easy it was to swap out the factory sliders for side steps; it made my JL so much more family-friendly without losing that rugged vibe.” – John Davis, Jeep Forum User.
Style plays a role too. Installing side step rails on Jeep JL can give your vehicle a more customized appearance. Whether you go for sleek black powder-coated options or something with a rugged texture, they enhance the overall profile. For those who take their Jeeps off-road, certain rails double as rock sliders, providing extra support when navigating obstacles.
Cost-wise, this is an affordable mod compared to bigger changes like lifts or bumpers. You can find quality sets starting around $200, and doing the install yourself keeps expenses down. Just remember, if your Jeep has factory rock rails, like on Rubicon models, you might need to remove them first, which adds a bit to the time involved.
Overall, this upgrade boosts both function and form, making your daily drives and trail runs more enjoyable. If you’ve been thinking about it, now’s a good time to plan the project.
Types of Side Step Rails Available for Jeep JL
When you’re ready to install side step rails on Jeep JL, knowing the different types helps you choose wisely. The most common are running boards, which are flat, wide platforms that run along the side of the vehicle. They’re great for easy access and often have non-slip pads for better grip. These work well for everyday use and fit both two-door and four-door JL models.
Then there are nerf bars, which are tubular rails that provide a step while offering side protection. They’re usually round or oval and made from steel or aluminum for durability. Nerf bars are popular among off-roaders because they’re lightweight yet strong enough to handle impacts. Some come with drop-down steps that lower for easier entry and tuck up when driving.
Rock sliders are another option, designed more for protection than stepping. They hug the body closely and can support the Jeep’s weight if you high-center on a rock. While not as convenient for daily stepping, they appeal to serious trail enthusiasts. Hybrid versions combine slider strength with step functionality, giving you the best of both.
Electric or power steps are a fancier choice. These deploy automatically when you open the door and retract when closed, keeping a clean look. They’re pricier and involve wiring, but ideal if you want convenience without permanent protrusion.
Materials matter too. Steel offers toughness but can rust if not coated properly, while aluminum is lighter and more resistant to corrosion. Finishes like powder coating help with longevity and matching your Jeep’s color.
Consider your model: four-door JLs need longer rails, while two-doors use shorter ones. Always check compatibility for your year, as JLs from 2018 onward have specific mounting points.
| Type of Side Step Rail | Best For | Material Options |
|---|---|---|
| Running Boards | Daily access | Steel, Aluminum |
| Nerf Bars | Off-road protection | Steel, Stainless |
| Rock Sliders | Trail durability | Heavy-duty Steel |
| Power Steps | Automatic convenience | Aluminum alloy |
This table shows a quick comparison to help narrow down choices based on your needs.
Tools and Materials You’ll Need
Gathering the right tools before you start to install side step rails on Jeep JL makes the whole process smoother. Most installations use basic hand tools you might already have in your garage. A ratchet set with sockets in sizes like 10mm, 13mm, and 16mm is essential, as many bolts are metric. Wrenches in those sizes help too, especially for tight spots.
If your Jeep has factory rock rails, you’ll need a socket extension to reach the bolts underneath. An impact driver can speed things up but isn’t required—hand tools work fine for most people. Don’t forget safety gear: gloves to protect your hands from sharp edges, and eye protection in case anything flies loose.
For materials, your side step kit will include brackets, bolts, washers, and the rails themselves. Some kits provide thread locker to keep bolts secure over time. If not, pick up a tube—it’s cheap insurance against vibrations loosening things.
A jack and jack stands are handy if you need to lift the Jeep for better access, but many installs can be done without raising it. Have a torque wrench ready to tighten bolts to the manufacturer’s specs, usually around 20-30 ft-lbs depending on the kit.
If you’re dealing with rust or stuck bolts, penetrating oil like WD-40 can save the day. Apply it ahead of time to let it soak in.
| Tool | Size/Purpose | Required? |
|---|---|---|
| Ratchet | Standard | Yes |
| Sockets | 10mm, 13mm, 16mm | Yes |
| Wrenches | Matching sizes | Yes |
| Torque Wrench | For final tightening | Recommended |
| Gloves & Eye Protection | Safety | Yes |
This table lists the basics to get you prepared without overcomplicating things.
Preparing Your Jeep for Installation
Before you begin to install side step rails on Jeep JL, take a few minutes to prepare. Park on a flat, level surface to keep everything stable. Engage the parking brake and chock the wheels if needed. If your Jeep has factory rock rails or sliders, you’ll likely need to remove them first. This is common on models like the Rubicon.
To remove factory rails, crawl under the Jeep and locate the mounting bolts along the frame. There are usually six to eight per side, secured with nuts or clips. Use your 13mm or 16mm socket to loosen them, starting from the ends and working inward. If they’re tight from dirt or rust, spray some penetrating oil and wait 10-15 minutes. Gently rock the rail to free it once all bolts are out.
Clean the mounting areas with a wire brush or rag to remove any grime. This ensures a secure fit for the new brackets. Check for any damage to the frame or pinch welds—if something looks off, address it before proceeding.
Unbox your side step kit and lay out the parts. Identify left and right sides, as they’re often specific. Read the instructions that come with your kit, even if you’ve done similar work before. Each brand might have slight differences in bracket placement.
If you’re installing power steps, locate a good spot for wiring, like near the battery or fuse box. Test fit the brackets without fully tightening to make sure everything aligns.
Taking these prep steps seriously helps avoid surprises and keeps the install clean and efficient.
“After installing nerf bars on my Rubicon, I noticed better protection on trails, and they’re solid for stepping too.” – Sarah Thompson, Off-Road Blogger.
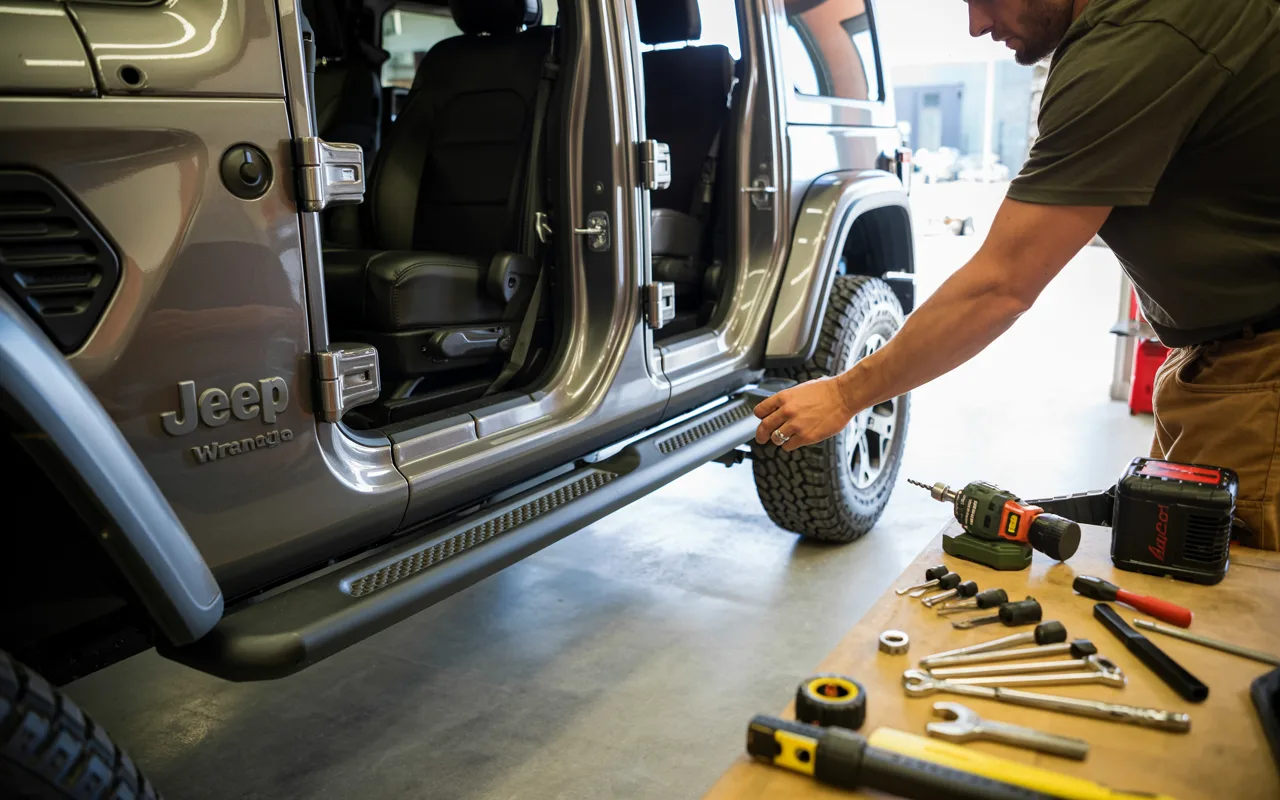
Step-by-Step Guide to Install Side Step Rails on Jeep JL
Now let’s get into the main part: how to actually install side step rails on Jeep JL. This guide assumes a standard manual kit for a four-door model, but notes variations for two-doors or other types. Always follow your specific kit’s manual for exact details.
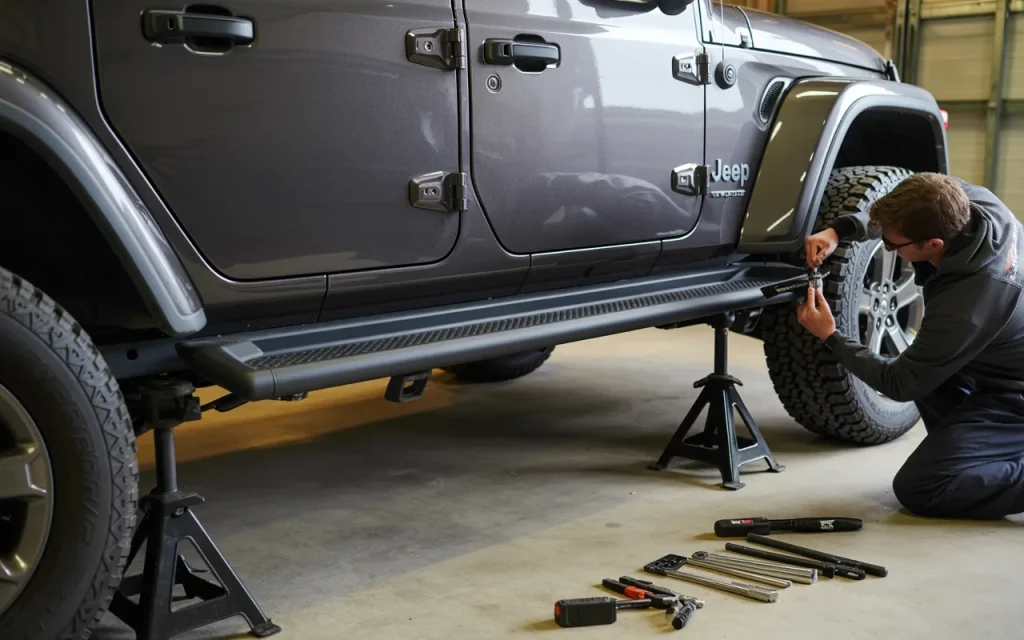
First, position the mounting brackets. Under the Jeep, find the pre-threaded holes or body mounts along the pinch seam. These are usually spaced at the front, middle, and rear. Slide the brackets into place, aligning holes with the frame. Insert the provided bolts and washers, but don’t tighten yet—just hand-thread them to hold position.
Next, attach the side step rail to the brackets. Lift the rail up and bolt it to each bracket using the hardware from the kit. Start with the center for balance, then do the ends. Use your ratchet to snug them up, but leave room for adjustments.
Once everything is loosely attached, check alignment. The rail should sit level and even with the body. Adjust as needed by shifting brackets slightly. Now tighten all bolts, starting from the brackets to the frame, then rail to brackets. Use a torque wrench to spec—often 25 ft-lbs for frame bolts.
For the other side, repeat the process. If your kit has end caps or covers, install them last for a finished look.
If installing on a two-door JL, note fewer brackets—usually two per side instead of three. Power steps add wiring: connect to the door sensors and battery, routing cables carefully to avoid pinching.
Test by stepping on the rails to ensure they’re secure. Wiggle them to check for looseness—if any, re-tighten.
This method should take about an hour per side for beginners, less with experience.
Handling Factory Rock Rail Removal
If your Jeep JL came with factory rock rails, removing them is a key step before you install side step rails on Jeep JL. These rails are bolted to the frame with several fasteners. Start by supporting the rail with a jack or having a helper hold it.
Underneath, remove the plastic clips or nuts holding the rail. A 10mm socket often fits these. Work methodically to avoid dropping parts. Once free, lower the rail carefully—it’s heavier than it looks.
Inspect the mounting points for corrosion. Clean if necessary, as this area collects dirt.
Some owners choose to modify the factory rails to add steps without full removal, like drilling holes for brackets. But for a clean install, taking them off is usually best.
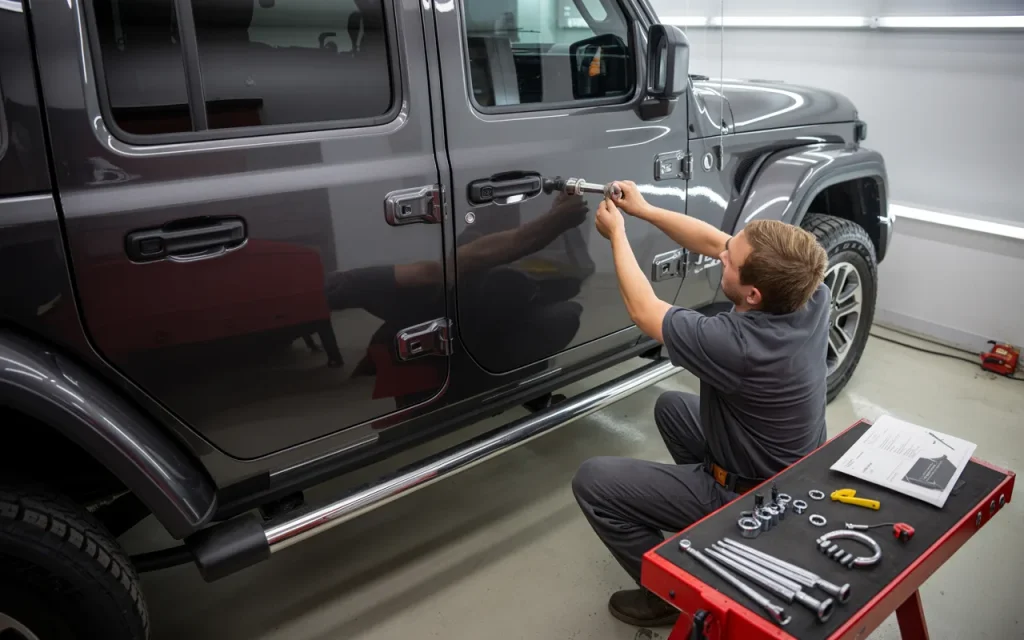
Installing Brackets Securely
Brackets are the foundation when you install side step rails on Jeep JL. Position them at the designated spots: front near the wheel well, middle under the doors, rear toward the back.
Secure with bolts through the frame holes. If no holes exist, some kits require drilling—mark carefully and use a center punch.
Tighten in a cross pattern, like lug nuts, for even pressure.
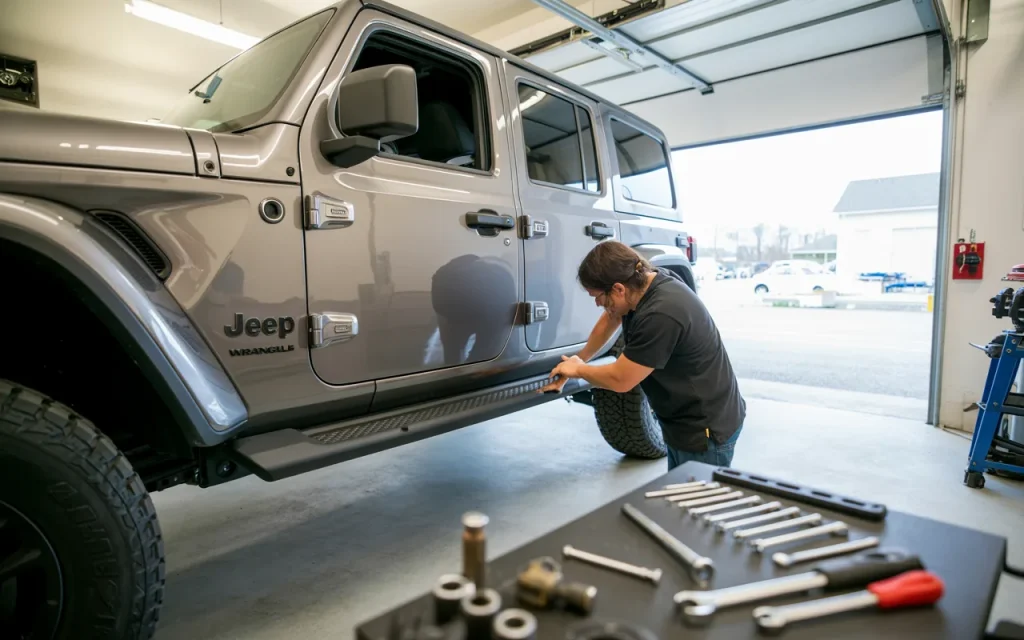
Attaching the Rails and Final Checks
With brackets in, bolt the rails on. Align holes and insert bolts with washers. Tighten gradually.
Step back and eyeball for straightness. Test weight on each section.
If anything feels off, loosen and realign.
Common Issues and How to Fix Them
Even with careful planning, issues can pop up when you install side step rails on Jeep JL. One frequent problem is misaligned brackets, causing the rail to sit crooked. Fix by loosening bolts and shifting until level—use a level tool if needed.
Rusty or seized factory bolts are another hassle, especially on older JLs. Soak with penetrating oil overnight if possible, then use a breaker bar for leverage.
If the kit doesn’t fit perfectly, double-check model compatibility. JLs have variations by year or trim.
Noise like rattling after install often means loose hardware. Go back and torque everything properly.
For power steps, wiring glitches might prevent deployment. Test connections and fuses.
Addressing these early keeps your setup reliable.
Maintenance After Installation
Once you install side step rails on Jeep JL, keeping them in good shape is simple. Wash regularly with soap and water to remove salt, mud, or grime that can cause corrosion. Avoid harsh chemicals that strip coatings.
Check bolts monthly, especially after off-roading, and re-tighten if needed. Apply thread locker if vibrations loosen them.
Inspect for damage like bends or cracks. Touch up paint chips to prevent rust.
For power steps, lubricate moving parts yearly and check wiring for wear.
Proper care ensures they last years.
Frequently Asked Questions
Do I need to remove factory rock rails to install side step rails on Jeep JL?
Yes, in most cases, especially if they’re in the way of the mounting points. It’s a straightforward removal with basic tools.
What tools are required to install side step rails on Jeep JL?
Basic sockets like 13mm and 16mm, a ratchet, wrenches, and possibly a torque wrench. No special equipment needed for most kits.
Can I install side step rails on a two-door Jeep JL?
Absolutely, but choose kits designed for two-doors, which are shorter and use fewer brackets.
How long does it take to install side step rails on Jeep JL?
About 1-2 hours for a standard kit, longer for power steps due to wiring.
Are side step rails compatible with lifted Jeep JLs?
Most are, but check clearance—some drop lower for better access on lifted vehicles.
“Power steps were a bit more work with the wiring, but worth it for the clean look when retracted.” – Mike Rivera, YouTube Reviewer.
Conclusion
Wrapping up, learning to install side step rails on Jeep JL is a rewarding DIY project that enhances your vehicle’s usability, safety, and appearance. We’ve covered the types, tools, preparation, detailed steps, troubleshooting, and maintenance to give you a complete picture. By following these guidelines, you can tackle the job with confidence and enjoy the benefits right away.
Remember, the key is taking your time and double-checking fits and tightness. If you’re new to this, start with a simple kit to build experience. For more resources, check online forums or videos for your specific model. Now go ahead, grab those tools, and make your Jeep even better suited to your lifestyle. Safe driving!