
How to Clean Your Car’s Plastic Trim for a Showroom Shine
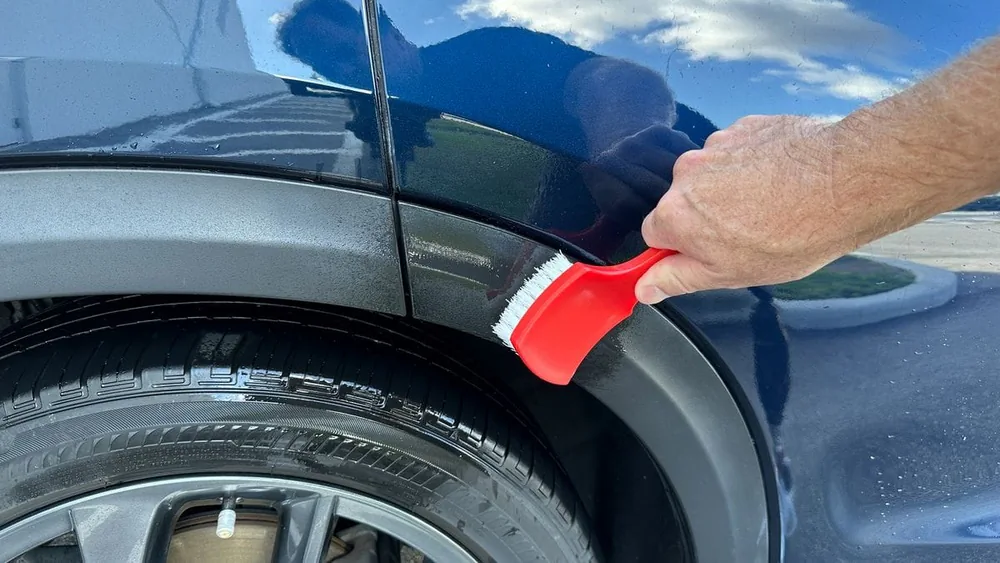
Keeping your car’s plastic trim clean can make a big difference in how your vehicle looks and feels. Over time, these plastic parts can become faded, dull, or even sticky from exposure to sunlight, road salt, and grime. Cleaning them is not just about appearance—regular care helps protect the material, keeps your car’s value high, and prevents costly repairs.
Whether you drive a brand-new SUV or an older sedan, a few simple steps can make your plastic trim look almost new again.
Why Clean Your Car’s Plastic Trim?
The plastic trim on cars includes bumpers, side moldings, window surrounds, and interior panels. These parts are often the first to show signs of wear, especially if you park outside or drive in harsh conditions. Dirt, UV rays, and chemicals can cause fading, discoloration, and even cracking. Clean trim gives your car a fresh, well-kept appearance and can help you avoid needing expensive replacements.
Neglecting the trim can also lead to long-term issues. Dirt buildup can damage the surface, while UV exposure weakens the plastic over time. If you plan to sell your car, clean trim can boost your resale value. For car owners who take pride in their vehicle, shiny and restored trim is simply more enjoyable to look at and touch.
Tools And Products You’ll Need
Before you start, gather the right tools and products. Using proper supplies makes the job faster and helps avoid damage.
| Tool/Product | Purpose |
|---|---|
| Microfiber towels | Wipe and buff plastic safely |
| Soft brush or detailing brush | Remove stubborn dirt in grooves |
| Bucket with water | Rinse dirt and chemicals |
| Plastic trim cleaner or all-purpose cleaner | Break down grime and stains |
| Trim restorer (optional) | Restore color and shine |
| Protectant with UV blockers | Prevent fading and cracking |
| Latex or nitrile gloves | Protect your skin |
Two insights many beginners miss: using plain dish soap can dry out or stain trim, and regular bath towels can scratch plastic, so stick to microfiber. Also, not all “all-in-one” car cleaners are safe for plastic—some contain strong solvents that cause fading.
Step-by-step Guide To Cleaning Exterior Plastic Trim
Let’s break down the process to get the best results:
1. Rinse Off Loose Dirt
Begin by rinsing the trim with clean water. This removes dust, sand, and loose debris that can scratch the plastic during cleaning. If you have a hose or pressure washer, use it gently and keep a distance of at least 12 inches to avoid damaging the trim.
2. Apply Cleaner
Spray a plastic-safe cleaner or diluted all-purpose cleaner onto the trim. Avoid harsh chemicals like bleach or ammonia, which can discolor and weaken the plastic. Let the cleaner sit for 1-2 minutes to loosen dirt.
3. Scrub Gently
Use a soft-bristled brush or a microfiber towel to gently scrub the trim. Pay attention to textured areas and corners where grime collects. For stubborn stains, make small circular motions and add a bit more cleaner if needed.
4. Rinse And Wipe Dry
Rinse the trim with water to remove all cleaner and dirt. Immediately dry the plastic with a clean microfiber towel. Air drying can leave water spots or streaks, especially on black trim.
5. Apply Trim Restorer (if Needed)
If your trim looks faded or gray after cleaning, consider a trim restorer. These products contain oils and dyes that refresh the color and add a deep shine. Apply a small amount to a microfiber applicator pad and work it into the plastic, following the grain or texture. Let it absorb for 5-10 minutes, then buff gently with a dry towel.
6. Protect With A Uv Blocker
The final step is to use a protectant designed for plastic. This creates a barrier against sunlight and slows future fading. Spray or wipe on according to the product instructions, and buff away any extra so the surface is not greasy.
Cleaning Interior Plastic Trim
Interior trim needs a gentler approach since it is more likely to be touched and less exposed to harsh weather.
- Vacuum first to remove dust and crumbs, especially around the dashboard, door panels, and cup holders.
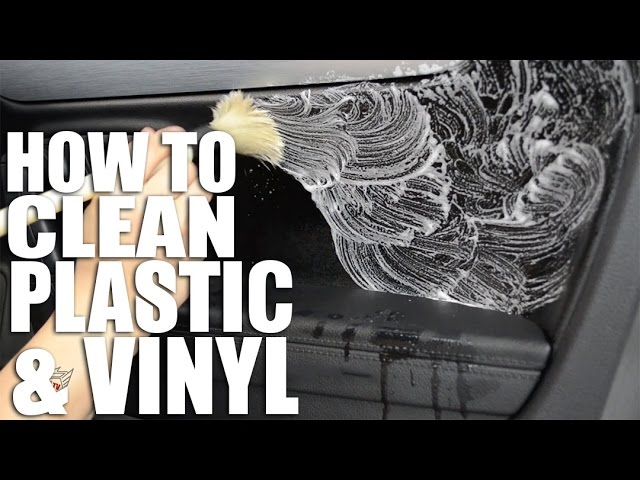
- Spray a small amount of interior cleaner or mild soap solution onto a microfiber towel (not directly onto the trim, to avoid overspray on electronics).
- Wipe all surfaces, paying extra attention to areas around switches, vents, and handles.
- Use a soft brush for air vents and seams.
- Dry with another towel.
- Apply a matte-finish protectant to avoid shiny or slippery surfaces.
One thing many people overlook: using glass cleaner on interior plastic can lead to streaks and residue. Also, avoid silicone-based products inside the car—they can attract dust and become sticky over time.
Credit: www.youtube.com
How Often Should You Clean Plastic Trim?
Frequency depends on your climate, driving habits, and whether you park indoors or outdoors.
| Condition | Recommended Cleaning Frequency |
|---|---|
| Sunny, hot climate | Every 2 weeks |
| Rainy or snowy area | Every 2-4 weeks |
| Mostly garage-kept | Once a month |
| Heavy off-road/dirty conditions | Weekly |
Even if your car looks clean, wiping the trim regularly removes unseen contaminants that cause slow fading.
Common Mistakes To Avoid
Cleaning plastic trim seems simple, but a few mistakes can cause permanent damage. Here are the most common errors:
- Using abrasive pads or brushes: These can scratch the surface. Always use soft materials.
- Letting cleaners dry on the surface: This can leave stains or streaks.
- Skipping UV protection: Faded trim is usually a result of sun exposure, not dirt.
- Applying products to hot surfaces: Clean and treat trim in the shade or when the car is cool.
- Overusing restorer: Too much product can make trim greasy or attract dust.
A less obvious mistake is cleaning trim with the same towel used for wheels or tires—this can transfer brake dust and harsh chemicals, causing stains.

Credit: www.drbeasleys.com
What If The Trim Is Already Faded?
If your trim is deeply faded or stained, cleaning alone may not restore its look. In these cases, a plastic dye or a more intensive restorer is needed. These products bond to the surface and recolor the plastic. Application is more involved—often requiring masking off nearby paint and multiple coats.
Some car owners try home remedies like peanut butter or olive oil for a quick fix. While these might darken the trim for a day or two, they don’t last and can actually attract dirt or turn rancid. It’s better to use a product made for automotive plastics.
For severe fading, replacement may be the only option. Compare the cost of new trim to professional restoration before deciding.
Comparing Popular Trim Cleaning Products
Choosing the right cleaner or restorer can be confusing. Here’s a quick look at three popular types:
| Product Type | Main Benefit | Drawback | Typical Price |
|---|---|---|---|
| All-purpose cleaner | Cleans most dirt and stains | May need follow-up with protectant | $5–$10 |
| Trim restorer | Restores faded color, adds shine | Temporary effect (weeks to months) | $10–$20 |
| Plastic dye | Permanent color change for severe fading | Requires careful application | $15–$30 |
A good rule: use a cleaner first, then upgrade to a restorer or dye only if cleaning doesn’t bring the results you want.
Tips For Long-lasting Results
- Park in the shade or use a car cover to reduce UV damage.
- Wax or seal the paint next to the trim to prevent staining from runoff.
- Address bird droppings and tree sap right away—they can stain both paint and plastic.
- Clean up road salt in winter as soon as possible; it dries out plastic and causes fading.
- Test any new product on a small, hidden area first.
Another tip most beginners miss: wiping down trim after every car wash, even with just water, keeps it looking fresh and removes leftover soap or wax.
When To Seek Professional Help
If your trim has deep scratches, gouges, or large faded areas, or if you’re not comfortable using dyes and restorers, a professional detailer can help. They have access to specialty tools and products that provide longer-lasting results. This may cost $50 to $200 depending on your car and local rates, but can be worth it for high-value or classic vehicles.

Credit: lithiumautocare.com
Frequently Asked Questions
How Can I Prevent My Car’s Plastic Trim From Fading?
Regular cleaning and applying a UV-protectant every few weeks can slow fading. Parking in the shade and using a car cover also help keep plastic trim looking new.
Can I Use Household Cleaners Like Windex Or Dish Soap On My Trim?
It’s best to avoid most household cleaners. They may contain chemicals that dry out or discolor plastic. Stick to automotive products or mild soap and water.
What Should I Do If My Plastic Trim Is Sticky?
Sticky trim is often caused by old protectants or sun damage. Clean thoroughly with an all-purpose automotive cleaner, then rinse and dry. If stickiness remains, you may need to remove the top layer with a plastic-safe solvent or replace the trim.
Is Using Peanut Butter Or Olive Oil Safe For Restoring Trim?
These home remedies can temporarily darken trim, but they don’t last and can attract dirt. For best results, use a product made for automotive plastic.
Where Can I Learn More About Caring For Automotive Plastics?
You can find detailed guides and product reviews from organizations like Consumer Reports, which covers car care in depth.
Taking a little time to clean and protect your car’s plastic trim pays off with a fresher look and better value. With the right products and a careful approach, your trim can shine for years to come.
Related posts
 Why You Should Use a Foam Cannon for Car Washing: Ultimate Guide
Washing your car is more than just making it look good. It protects the paint, keeps the value high, and makes driving feel better. But if…
 How to Clean Leather Seats Without Damaging Them: Expert Tips
Keeping your leather seats clean can be a challenge. Leather looks beautiful and feels luxurious, but it needs special care. Many people worry about damaging their…
 Why Using a Ceramic Coating Spray is Important for Your Car’s Shine
If you care about your car’s appearance and value, you probably wash and wax it regularly. But did you know there’s a better way to protect…