
How to Clean the Engine Bay of Your Vehicle Like a Pro
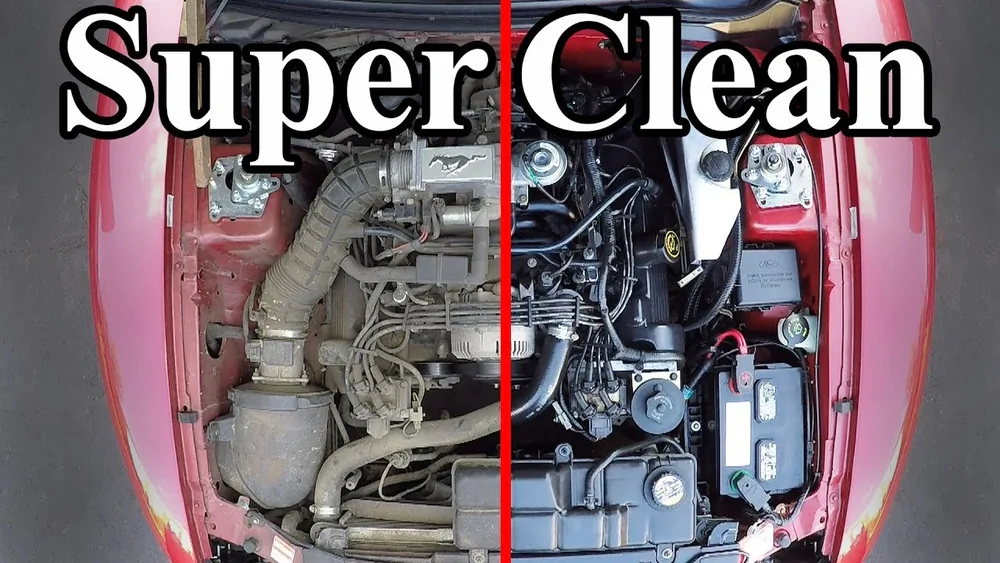
Cleaning the engine bay of your vehicle may sound intimidating, but it’s a task any car owner can master with the right steps. A clean engine bay isn’t just about looks—it can help you catch leaks early, keep components cooler, and even improve resale value.
Dirt, oil, and road grime build up over time, making your engine work harder and sometimes even causing odors. If you’ve never tackled this project before, you might worry about damaging sensitive parts or making a mess. Don’t worry. With some preparation and careful work, you can clean your engine bay safely and efficiently.
Why Clean Your Engine Bay?
A lot happens under the hood. As you drive, dust, oil, and debris collect around the engine. Over months or years, this buildup can hide leaks, trap heat, and speed up wear on hoses and plastic covers. For those living in areas with heavy winter road salt or high humidity, corrosion is a real risk. Regular cleaning can:
- Expose fluid leaks early
- Prevent rust and corrosion on metal parts
- Reduce risk of electrical issues caused by grime
- Improve engine cooling efficiency
- Help mechanics work more effectively
It’s a little effort with real benefits for your vehicle’s health and your peace of mind.
What You’ll Need
Before starting, gather the right materials. Using proper tools makes the process safer and faster. Here’s a checklist:
- Protective gloves and eyewear
- Plastic bags and tape (to cover sensitive parts)
- Soft brushes (old toothbrushes work well)
- Microfiber towels
- Mild degreaser (engine-safe, not household cleaner)
- Low-pressure hose or spray bottle
- Bucket of clean water
- Compressed air (optional, for drying)
- Vacuum (optional, for dry debris)
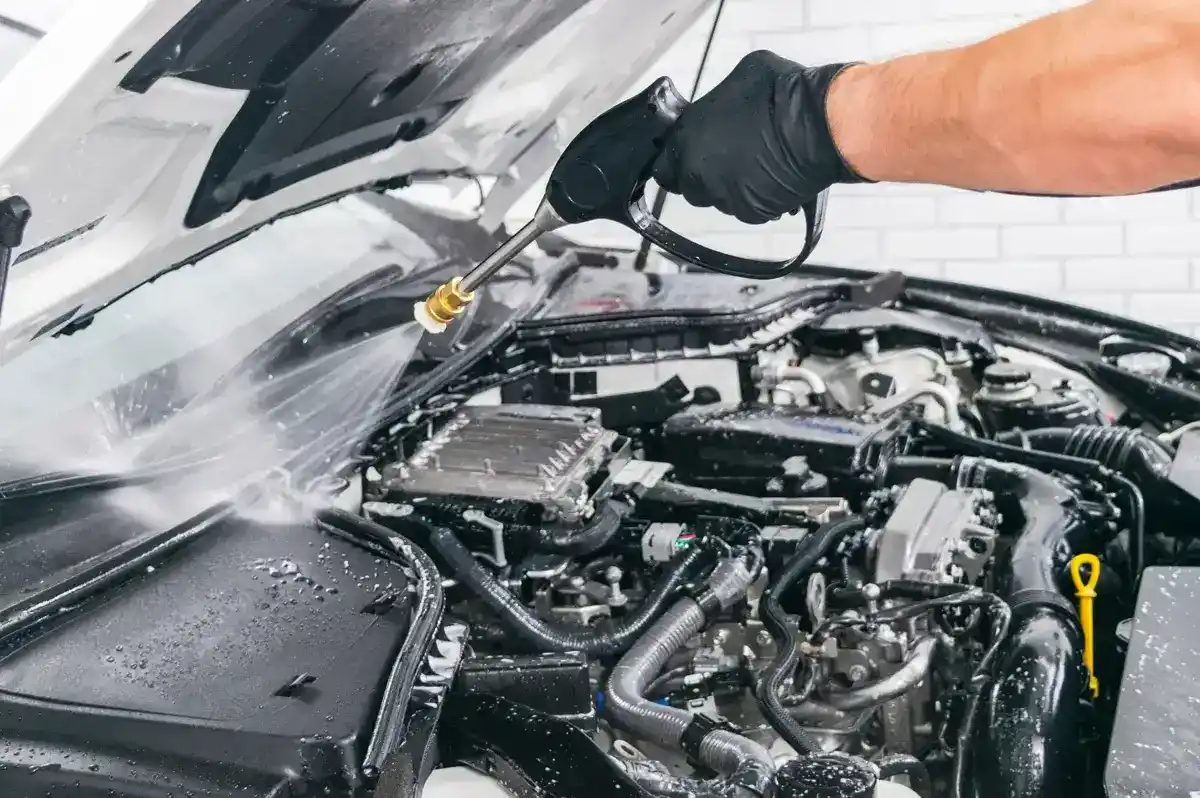
Avoid harsh chemicals or high-pressure washers, as they can damage sensitive electronics or seals.
Credit: www.gulfoilltd.com
Preparing The Engine Bay
Good preparation is key to a safe and thorough clean. Take your time with this step, especially if it’s your first attempt.
Let The Engine Cool Down
Never clean a hot engine. Wait at least 30-45 minutes after driving. A cool engine reduces the risk of burns and prevents water from cracking hot components.
Remove Loose Debris
Start by popping the hood and using your hands or a vacuum to remove leaves, twigs, and loose dirt. Pay attention to corners and around the windshield cowl area—these spots collect debris that can block drainage and encourage rust.
Protect Sensitive Components
Modern engines have many electronic connectors, sensors, and exposed wiring. Cover these with plastic bags and secure them with tape. Focus on:
- Battery terminals
- Alternator
- Fuse boxes
- Air intake or exposed filters
- Any open or cracked wiring
If you have an older car, you may also want to cover the distributor and carburetor.
Disconnect The Battery (optional But Recommended)
For extra safety, disconnect the negative battery terminal. This step prevents accidental shorts or electrical issues, especially if you plan to use a lot of water. However, note that disconnecting the battery may reset radio or clock settings.
Degreasing And Cleaning
Now the real cleaning begins. Don’t rush—work in sections and use minimal water to avoid damage.
Apply Degreaser
Spray a mild, engine-safe degreaser onto dirty surfaces. Let it sit for 3-5 minutes, but don’t let it dry out. Pay special attention to:
- Valve covers
- Engine block sides
- Fluid reservoir caps
- Visible oil stains
For stubborn spots, use a soft brush or toothbrush to scrub gently. Avoid metal brushes, which can scratch plastic or painted parts.
Agitate And Loosen Grime
Focus on areas with heavy buildup. Move the brush in small circles, and use a microfiber towel to lift away loosened dirt. On plastic covers, work gently to avoid scuffs. For tight spots, a small detailing brush or a paintbrush can help.
Rinse Carefully
Use a low-pressure hose or a spray bottle to rinse away the degreaser and grime. High pressure can force water into seals, connectors, or electrical boxes, causing hidden problems.
- Rinse from top to bottom to direct dirty water away from sensitive parts.
- Avoid soaking covered areas (battery, fuse box, alternator).
- Wipe up excess water with a microfiber towel.
Dry The Engine Bay
After rinsing, remove all plastic coverings carefully. Dry as much as possible with clean towels. For faster results or hard-to-reach spots, use compressed air or let the engine idle (with hood open) for 10-15 minutes. This helps evaporate any remaining moisture.
Pro tip: Water can hide in wire harnesses or under sensors. Always check twice before reconnecting the battery or closing the hood.
Cleaning Plastic, Rubber, And Metal Parts
Engine bays are a mix of materials, each requiring a slightly different touch.
Plastic Covers And Reservoirs
Wipe plastic surfaces with a damp microfiber towel. For faded or dull plastic, a dedicated plastic restorer can revive shine. Avoid silicone sprays—they can attract dust.
Rubber Hoses And Seals
Rubber parts dry out over time, leading to cracks or leaks. After cleaning, apply a rubber conditioner (not tire shine) with a cloth. This keeps hoses flexible and helps them last longer.
Metal Components
For metal brackets or exposed bolts, a quick wipe with degreaser and a towel removes surface rust and grime. If you notice deep corrosion, consider a light application of anti-rust spray, but never spray directly onto hot engine parts.
Inspecting For Issues As You Clean
One hidden benefit of engine bay cleaning is early detection of problems. As you work, look for:
- Oil or coolant leaks: Wet or stained areas under hoses or around gaskets.
- Cracked hoses: Feel for soft spots, bulges, or splits.
- Loose belts or wires: Wiggle gently to check for secure connections.
- Corrosion: White or green powder on battery terminals or metal parts.
Noticing these issues early lets you fix them before they become expensive repairs.
Finishing Touches And Reassembly
Once everything is clean and dry, it’s time to remove covers and reconnect the battery.
- Double-check all plastic bags are removed.
- Reconnect the battery terminal if you disconnected it.
- Start the engine and let it run for a few minutes with the hood open.
- Listen for any unusual noises, and check that all electronics (lights, radio) work normally.
If you used a dressing on rubber or plastic, give it time to absorb before driving.
Frequency: How Often Should You Clean?
For most drivers, a deep engine bay clean is needed every 6-12 months. If you drive in dusty areas, near the ocean, or on salted winter roads, more frequent cleaning is helpful. Spot-clean spills or leaks as soon as you see them.

Credit: www.crcindustries.com
Common Mistakes To Avoid
Even careful car owners make errors. Here’s what to watch out for:
- Using high-pressure water: Can force moisture into electronics.
- Skipping protective covers: Risk of short circuits.
- Letting degreaser dry: Can stain or etch plastics.
- Neglecting to dry thoroughly: Leads to rust or mold.
- Using harsh chemicals: May damage paint, rubber, or wiring.
Taking your time and following each step protects your car and gives the best results.
Example: Comparing Clean Engine Bay Vs. Dirty Engine Bay
A clean engine bay doesn’t just look better—it can make a difference when selling or servicing your car. Here’s a quick comparison:
| Aspect | Clean Engine Bay | Dirty Engine Bay |
|---|---|---|
| Resale Value | Higher, looks well-maintained | Lower, may hide problems |
| Leak Detection | Easy, leaks stand out | Difficult, hidden by grime |
| Component Life | Longer, less heat & corrosion | Shorter, more wear & tear |
Quick-reference: Cleaning Products Comparison
Choosing the right product matters for safety and results. Here’s a look at three common options:
| Product Type | Safe for Electronics | Effectiveness | Average Cost |
|---|---|---|---|
| Dedicated Engine Degreaser | Yes | High | $7–$15 |
| All-Purpose Cleaner | Usually | Medium | $5–$10 |
| Household Degreaser | No | Low | $3–$7 |
Advanced Tips For A Professional Finish
If you want your engine bay to really shine, consider these pro-level steps:
- Use a detailing brush to clean tight spots around bolts and clamps.
- Polish metal parts with a metal-safe polish (never use on hot parts).
- Apply a light coat of engine bay dressing for a “like-new” finish—but never on belts or moving parts.
- Take before-and-after photos for your records or resale value.
Environmental And Safety Considerations
Always dispose of dirty water, towels, and used chemicals properly. Avoid letting degreaser run into storm drains—it can harm the environment. Many cities offer hazardous waste disposal for car chemicals. Wear gloves and work in a well-ventilated area.
For more details about safe car cleaning practices, you can check resources like the EPA guide for automotive service facilities.
Frequently Asked Questions
Is It Safe To Wash My Engine Bay With Water?
Yes, if you use low pressure and cover sensitive parts. Avoid soaking electrical connectors or exposed filters. Never use a pressure washer.
How Long Does It Take To Clean An Engine Bay?
Most jobs take 30–60 minutes. If it’s your first time or the engine is very dirty, expect up to 90 minutes.
Can I Use Dish Soap To Clean My Engine Bay?
It’s better to use a dedicated engine degreaser. Dish soap isn’t designed for automotive grime and can leave residue or harm rubber parts.
Do I Need To Disconnect The Battery Every Time?
Not always, but it’s recommended for beginners or when using lots of water. For quick, light cleaning, you can usually leave the battery connected if you’re careful.
How Can I Keep My Engine Bay Clean Longer?
Regularly wipe down surfaces with a damp microfiber towel and fix leaks as soon as they appear. Avoid parking under trees to reduce debris.
Cleaning your engine bay may seem like a small step, but it makes a big difference in your car’s long-term health and value. With patience and care, you’ll have a safer, cleaner, and more reliable vehicle.

Credit: bigsmobile.com
Related posts
 Why You Should Use a Foam Cannon for Car Washing: Ultimate Guide
Washing your car is more than just making it look good. It protects the paint, keeps the value high, and makes driving feel better. But if…
 How to Clean Leather Seats Without Damaging Them: Expert Tips
Keeping your leather seats clean can be a challenge. Leather looks beautiful and feels luxurious, but it needs special care. Many people worry about damaging their…
 Why Using a Ceramic Coating Spray is Important for Your Car’s Shine
If you care about your car’s appearance and value, you probably wash and wax it regularly. But did you know there’s a better way to protect…