
How to Clean Interior Plastic Trim of Your Car Like a Pro
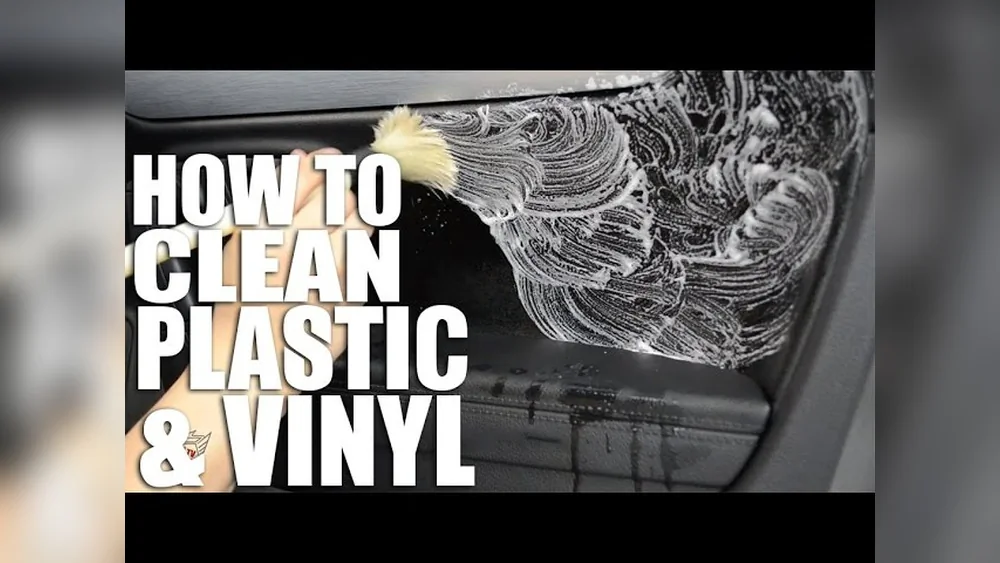
Keeping your car’s interior looking fresh is about more than just vacuuming the seats or wiping down the dashboard. The plastic trim inside your car—those panels, door inserts, center consoles, and dashboard pieces—plays a big role in how clean and new your vehicle feels. Over time, dust, grime, sunscreen residue, and even fingerprints collect on these surfaces, making your car look older than it really is. Cleaning the interior plastic trim properly not only improves appearance but also helps maintain resale value. If you want to learn the best way to clean these parts safely, efficiently, and without damaging them, you’re in the right place.
Why Clean Interior Plastic Trim Regularly?
Plastic trim inside your car faces daily abuse. Sunlight, sweat, spilled drinks, and even cleaning products can cause fading, scratches, and sticky residue. Over time, neglecting these surfaces can lead to permanent stains or cracks.
There are other benefits too:
- Better air quality: Dust and allergens can stick to plastic trim, making the air less healthy to breathe.
- Improved driving experience: Clean surfaces make your car feel more comfortable and enjoyable.
- Longer lifespan: Regular care helps prevent cracks and fading, which can be expensive to fix.
According to a study by the International Carwash Association, cars with clean interiors can command up to 15% higher resale prices compared to similar, dirty vehicles. That’s a strong motivation to keep things spotless.
Tools And Products You’ll Need
Before you start, gather the right tools and cleaning agents. Using the wrong product can leave streaks, attract more dust, or even damage your plastic trim.
| Tool/Product | Purpose | Extra Tip |
|---|---|---|
| Microfiber towels | Wiping and drying | Prevents scratches, reusable |
| Soft-bristle brush | Loosening dirt in crevices | Toothbrush works in a pinch |
| Vacuum with brush attachment | Removing loose debris | Use before wet cleaning |
| Dedicated plastic cleaner | Safe, streak-free cleaning | Avoid household cleaners |
| Interior protectant | UV protection, shine | Choose non-greasy formulas |
| Cotton swabs | Detailing small areas | Great for vents and buttons |
Avoid using products like bleach, ammonia, or window cleaner (with alcohol), as these can dry out or discolor plastic trim.

Credit: www.colorbondpaint.com
Step-by-step: How To Clean Interior Plastic Trim
Cleaning your car’s plastic trim is easy when you follow a plan. Here’s a practical, proven process you can use on any vehicle.
1. Remove Loose Debris
Start by taking out any personal items, trash, or floor mats. Use a vacuum with a soft brush attachment to remove dust, crumbs, and pet hair from all plastic surfaces. Pay attention to corners, cup holders, and under the seats.
2. Dry Dusting
Take a clean, dry microfiber towel and gently wipe all plastic trim. This lifts off surface dust and prepares the area for deeper cleaning. If you skip this step, you risk rubbing grit into the plastic, which can cause scratches.
3. Clean With Appropriate Product
Spray a dedicated interior plastic cleaner onto a microfiber towel (not directly on the trim). Wipe down all plastic surfaces, including the dashboard, door panels, center console, and seat backs.
- For stubborn spots (like sticky residues or sunscreen marks), use a soft-bristle brush with a bit of cleaner.
- For small or tight areas (air vents, around buttons), use a cotton swab dipped in cleaner.
Don’t soak the plastic—excess moisture can drip into electronics.
4. Rinse And Dry
After cleaning, use a separate damp microfiber towel to remove any leftover cleaner. Then dry the surfaces with a dry towel to prevent streaks or water spots.
5. Apply Interior Protectant
This step is often skipped, but it’s key if you want your plastic trim to last.
- Use a UV-protecting interior dressing or protectant. This helps prevent fading and cracking from sunlight.
- Apply a small amount to a microfiber towel and rub evenly onto the plastic.
- Buff off any excess with a clean towel to avoid a greasy finish.
Some products offer a matte look, while others add a subtle shine. Choose according to your taste.
6. Final Detailing
Check your work in good light. Re-clean any missed spots or streaks. Use a dry cotton swab to tidy up tight spaces, buttons, or logos.
Comparing Cleaning Products For Interior Plastic Trim
Not all cleaning products are created equal. Here’s a quick comparison of popular options:
| Product Type | Pros | Cons | Best For |
|---|---|---|---|
| Dedicated plastic cleaner | Safe, streak-free, designed for cars | More expensive | All interior trim |
| Mild soap & water | Cheap, easy to find | May leave residue, not for tough grime | Quick, light cleaning |
| All-purpose cleaner | Multi-use, effective on many surfaces | May dry out plastic, check label | Stubborn dirt |
| Homemade vinegar mix | Eco-friendly, cheap | Strong smell, may not protect UV | Budget-conscious users |
For most people, a dedicated plastic cleaner is worth the investment, especially for newer vehicles or for those wanting the best results.
Mistakes To Avoid When Cleaning Plastic Trim
Even experienced car owners make these errors, which can damage your car’s interior over time:
- Using harsh chemicals: Cleaners with bleach, ammonia, or alcohol can discolor or dry out plastic.
- Scrubbing with rough materials: Paper towels or old rags can scratch the surface.
- Skipping UV protection: Sun exposure is the biggest enemy of plastic trim.
- Spraying cleaner directly: Liquid can seep into seams and electronics, causing malfunctions.
- Over-wetting: Too much water can leave streaks or get into electronic controls.
A common insight: most beginners use too much product. Less is usually more—especially with modern, concentrated cleaners.
Dealing With Stains, Scuffs, And Discoloration
Stains and scuffs on interior plastic trim are often stubborn, but they’re not always permanent. Here are some practical ways to tackle them:
Stains
- For food or drink spills, blot up the mess quickly with a dry towel, then clean with a gentle cleaner.
- For ink, try a small dab of isopropyl alcohol on a cotton swab (test in an unseen area first).
Scuffs
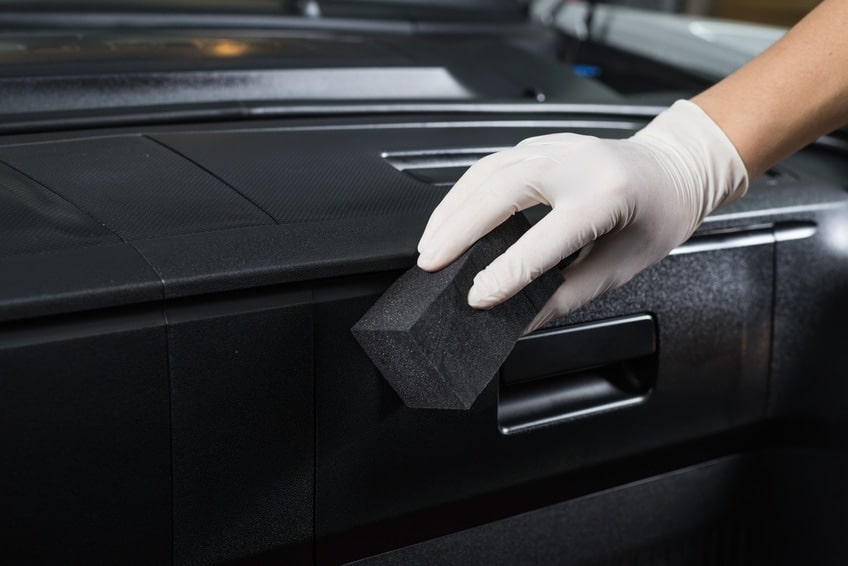
- Use a magic eraser (melamine foam) lightly on the affected area. Don’t rub hard, as this can dull the finish.
- If the scuff is deep, a plastic restorer product can help minimize its appearance.
Discoloration
- Faded plastic can sometimes be revived with a plastic trim restorer. These products add oils and color back into the material.
- For severe discoloration, replacement may be the only option.
A tip most beginners miss: always check cleaning products on a hidden spot first to make sure they won’t cause more harm.

Credit: www.youtube.com
Preventing Future Dirt And Damage
After you’ve cleaned your plastic trim, a few simple steps can help keep it looking good longer:
- Park in the shade or use a sunshade to reduce UV damage.
- Regularly dust with a microfiber towel (once a week is enough).
- Avoid eating and drinking inside the car to reduce spills.
- Apply protectant every 2-3 months, or after deep cleaning.
For families, consider using seat covers and tray liners—these can help protect the most vulnerable areas from sticky fingers and shoes.
Professional Detailing Vs. Diy: What’s Right For You?
Should you clean your plastic trim yourself, or pay a professional? Here’s a quick comparison:
| Option | Cost | Time | Quality | Best For |
|---|---|---|---|---|
| DIY Cleaning | $10-$30 (products/tools) | 30–60 minutes | Very good, if done carefully | Most owners |
| Professional Detailing | $75–$200 | 1–2 hours | Excellent, includes hard-to-reach spots | Show cars, resale, busy people |
For most drivers, DIY cleaning is enough—especially if you keep up with regular maintenance. But if you’re selling your car or want showroom results, a professional detailer can be worth the investment.
When To Replace Interior Plastic Trim
Sometimes, cleaning just isn’t enough. Deep scratches, cracks, or severe fading may require replacement. Signs it’s time for new trim include:
- Cracks that keep growing
- Pieces that won’t stay attached
- Discoloration that won’t improve with cleaning or restoration
Replacement kits are available for many cars, but installation can be tricky. If you’re not comfortable with car repairs, consider professional help.
Frequently Asked Questions
How Often Should I Clean My Car’s Interior Plastic Trim?
Ideally, you should dust weekly and do a deep clean every 2–3 months. If you drive in dusty conditions or have kids/pets, clean more often.
Can I Use Household Cleaners On Plastic Trim?
It’s best to avoid them. Many household products contain harsh chemicals that can damage or fade plastic. Stick with products made for car interiors.
What’s The Safest Way To Clean Textured Plastic?
Use a soft-bristle brush with a gentle cleaner. This lifts dirt from the grooves without scratching. Always wipe away residue with a microfiber towel.
How Do I Remove Sticky Residue From Plastic Trim?
First, try a dedicated interior cleaner. For stubborn spots, a small amount of isopropyl alcohol on a cotton swab can help—but always test in a hidden spot.
Where Can I Find More Information On Car Interior Care?
The Car Care Council offers tips and guides at CarCare.org.
Taking care of your car’s interior plastic trim is one of the easiest and most effective ways to keep your vehicle looking and feeling new. With the right tools, a little effort, and regular attention, you can prevent damage, save money, and enjoy a more pleasant ride every day.
Credit: www.holtsauto.com
Related posts
 Why You Should Use a Foam Cannon for Car Washing: Ultimate Guide
Washing your car is more than just making it look good. It protects the paint, keeps the value high, and makes driving feel better. But if…
 How to Clean Leather Seats Without Damaging Them: Expert Tips
Keeping your leather seats clean can be a challenge. Leather looks beautiful and feels luxurious, but it needs special care. Many people worry about damaging their…
 Why Using a Ceramic Coating Spray is Important for Your Car’s Shine
If you care about your car’s appearance and value, you probably wash and wax it regularly. But did you know there’s a better way to protect…